Tag: buying-guide

  • Smart Desk Gadgets Checklist: What’s Actually Worth Adding to Your Setup

    Smart Desk Gadgets Checklist: What’s Actually Worth Adding to Your Setup

    This post contains affiliate links. If you buy through these links, we may earn a commission at no extra cost to you.

    “Smart desk gadgets” covers a lot of ground, from genuinely useful hubs to things that look nice in a flat-lay photo and then sit unused by week two. Before adding anything new to your setup, it helps to sort gadgets into three buckets: things you’ll reach for daily, things that solve a specific seasonal problem, and things you can safely skip. This checklist walks through what’s actually worth checking off first.

    Overhead view of a desk with smart gadgets including wireless earbuds and phone

    Start With What You Actually Plug In Every Day

    Before buying anything new, count how many devices compete for the same two or three ports on your laptop. If you’re constantly unplugging a mouse dongle to plug in a monitor cable, then swapping that for a phone charger, that’s the real problem — not a lack of gadgets, just too many trade-offs at one connection point. Once you know exactly what needs to stay connected at the same time, the rest of this list gets a lot easier to shop for.

    Checklist Item 1: A Hub That Matches Your Actual Ports

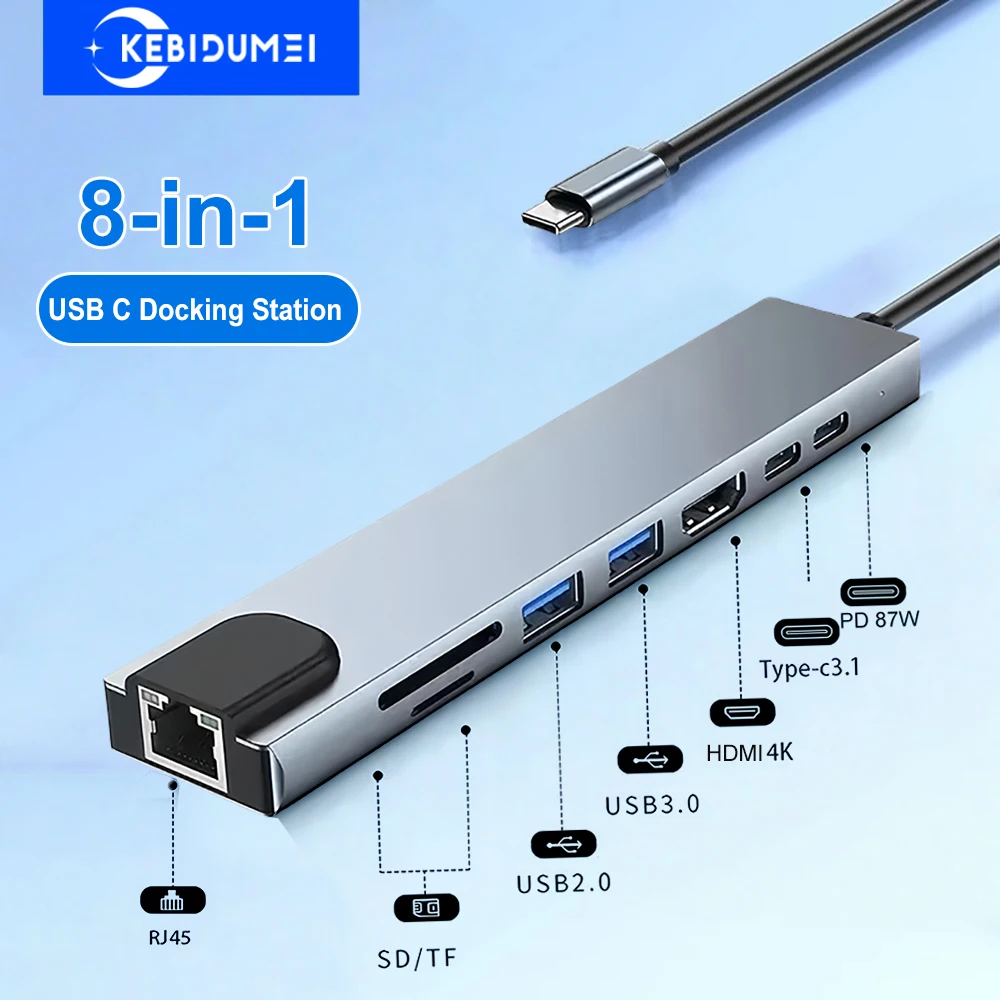
    A USB hub or docking station only helps if it covers the ports you use, not the ports a spec sheet lists. If you regularly connect an external monitor, a wired keyboard, and a phone at the same time, a single small dongle usually isn’t enough — you’ll want something with dedicated HDMI, multiple USB-A, and pass-through charging. We compared the two main options in more detail in our USB hub vs. docking station guide, including when the cheaper hub is genuinely enough. This 8-in-1 USB-C hub (affiliate link) is a reasonable starting point if you need HDMI output plus a few extra ports without committing to a full docking station.

    Checklist Item 2: Wireless Charging, With One Condition

    A wireless charging pad only earns its spot on the desk if your phone actually supports Qi charging without a case swap — otherwise it becomes a pad you keep meaning to use and don’t. If that condition is met, it’s a genuinely convenient upgrade: drop your phone down between calls instead of hunting for a cable. We go through the trade-offs, including charging speed and case compatibility, in our wireless charging pad breakdown. A basic foldable wireless charging stand (affiliate link) covers most desks without taking up much space.

    Checklist Item 3: Airflow for Warmer Months

    This one is seasonal rather than essential, but if your desk sits away from a window or air vent, a small USB-powered fan solves a real problem cheaply. It won’t replace air conditioning, but it makes a noticeable difference during a long afternoon of video calls. We covered a few low-cost airflow options, fans included, in how to keep your desk cool in summer.

    Smartwatch next to a laptop on a desk

    What Can Wait

    Not everything marketed as a “smart desk gadget” needs a spot on your setup right away. Decorative LED strips, novelty desk toys, and gadgets that duplicate something your phone already does well are easy to skip until the essentials above are actually in place. Start with the connection problem, then the seasonal one, and only add extras once you’ve used the setup long enough to know what’s actually missing.


  • How to Choose Between a Desk Mat and a Full Desk Pad

    How to Choose Between a Desk Mat and a Full Desk Pad

    This post contains affiliate links. If you buy through these links, we may earn a commission at no extra cost to you.

    Desk mats and full desk pads solve a similar problem at different scales, and picking the wrong size means either wasted money or a desk that still looks and feels unfinished.

    What a desk mat actually covers

    A desk mat typically covers the area directly in front of you — keyboard, mouse, maybe a wrist rest — leaving the rest of the desk surface exposed. It’s the cheaper, more common option, and it’s usually enough if your only complaint is mouse tracking or a keyboard sliding around.

    What a full desk pad changes

    A full desk pad covers the entire desktop edge to edge. It’s less about function and more about how the desk looks and feels as a whole — hiding scratches, unifying mismatched furniture, and giving the whole surface the same texture instead of a mat-sized island in the middle.

    Material matters more than size

    Whichever size you pick, felt and fabric-topped options feel warmer and quieter to type on, while vinyl or leather-look mats are easier to wipe clean but can feel slippery under a mechanical keyboard. A large wool felt desk mat with non-slip backing is a reasonable middle ground — soft enough to type on comfortably, with a backing that actually stays put. (affiliate link)

    Which one fits your setup

    If your desk already looks fine and you just want better tracking and a softer typing feel, get a mat sized for your keyboard and mouse. If your desk itself is scratched, mismatched, or just looks unfinished, a full pad solves that in one purchase instead of trying to fix the desk underneath it.

  • Budget Desk Upgrade: $50 vs $150 vs $300 Setup Comparison

    Budget Desk Upgrade: $50 vs $150 vs $300 Setup Comparison

    Desk upgrade budgets scale differently than most people expect — the jump from $50 to $150 changes more than the jump from $150 to $300 does. Here’s roughly what each budget tier actually gets you.

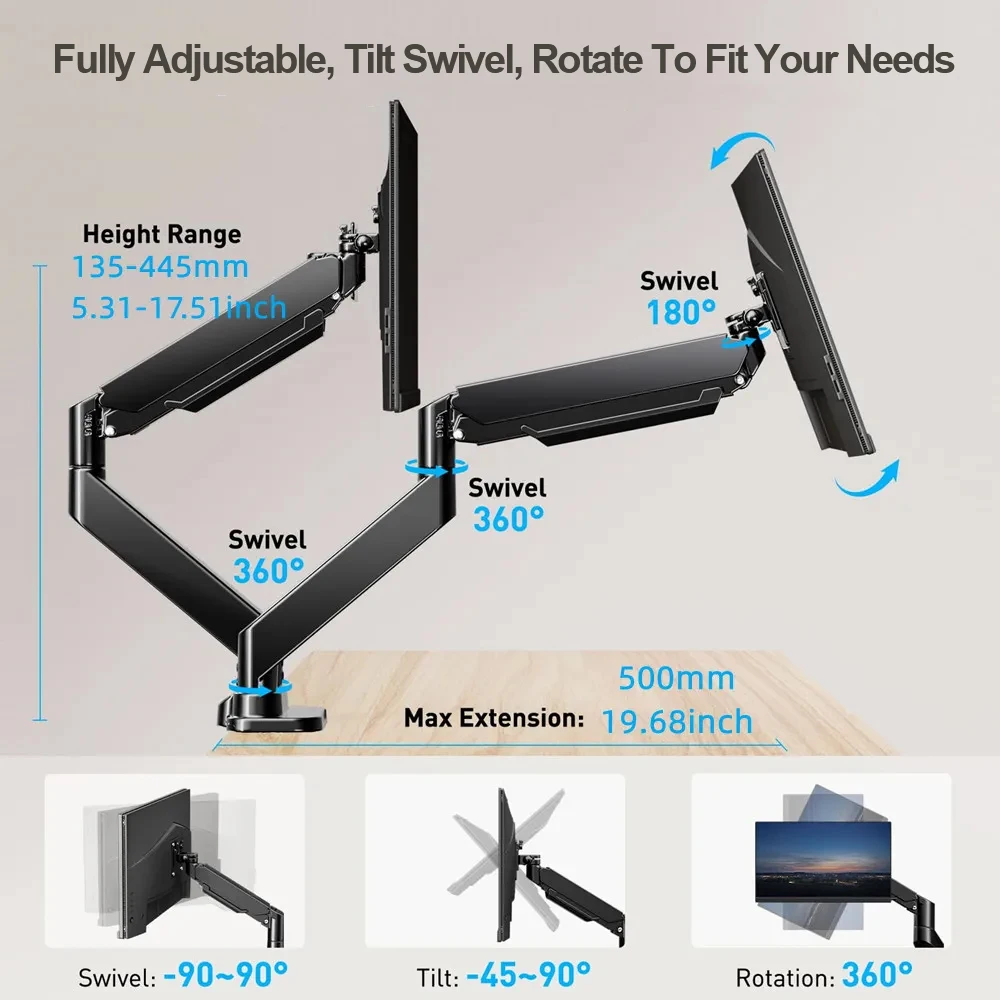
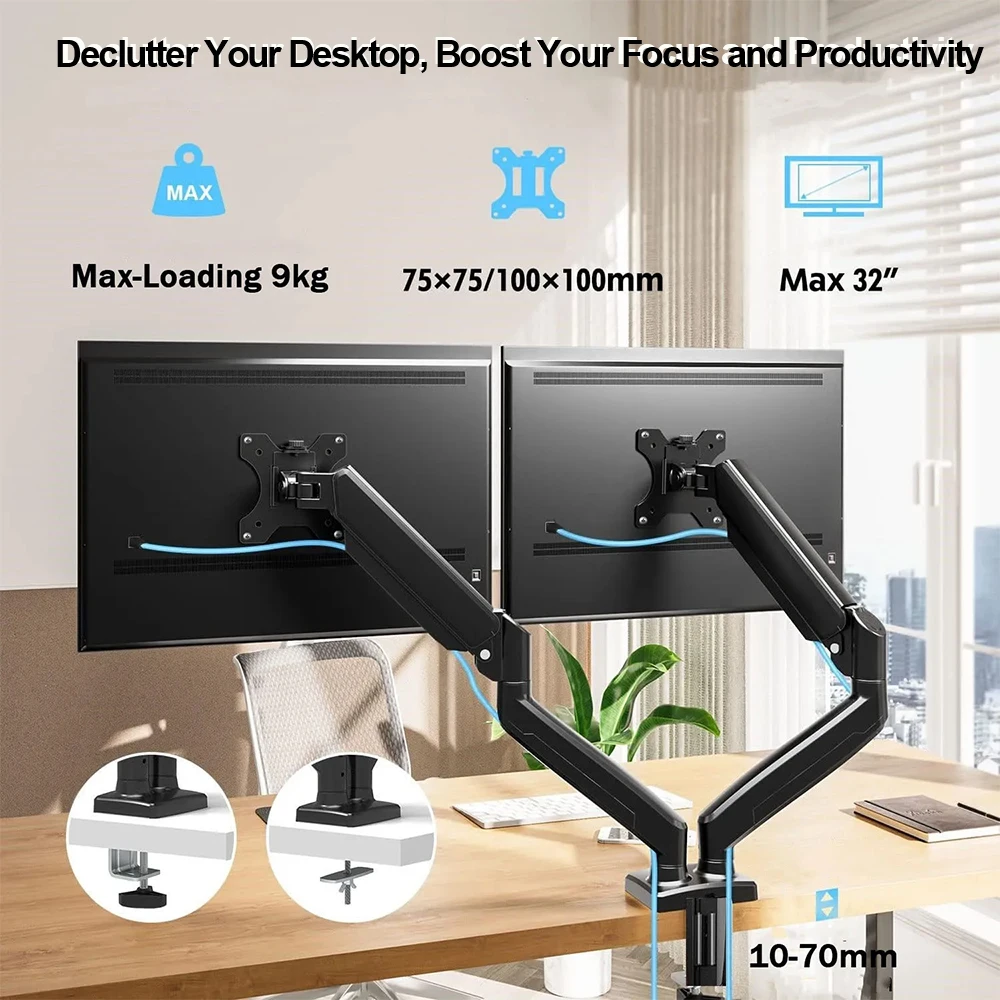
    Premium tier: fully adjustable dual monitor arm

    $50 tier: fix the worst problem, not everything

    At this budget, pick the single biggest pain point and solve just that. A basic monitor riser or a no-drill cable tray each cost well under $50 and meaningfully improve one specific issue — posture or cable clutter — without trying to overhaul the whole desk. Spreading $50 thin across five small items usually accomplishes less than solving one problem well.

    $150 tier: this is where real ergonomic gains start

    At $150, a single-arm monitor mount plus a decent adjustable desk lamp becomes realistic, and this tier is where most of the practical, daily-use ergonomic improvement actually happens — freeing desk space with a monitor arm and fixing eye strain with proper lighting solve two of the most common desk complaints directly. This tier delivers more noticeable day-to-day improvement per dollar than either tier above or below it.

    $300 tier: diminishing returns start, but comfort compounds

    At $300, a dual monitor arm, premium desk mat, and a proper cable management system are all in reach together. The improvement over the $150 tier is real but smaller in proportion — you’re refining an already-decent setup rather than fixing an obviously broken one, so the jump feels less dramatic even though the total comfort is higher.

    Budget tier basic cable management

    Sequencing matters more than total budget

    Buying a premium desk mat before fixing a bad monitor height, for example, spends money on comfort while leaving the actual ergonomic problem untouched. Whatever your total budget, address monitor height and cable clutter first — they affect posture and daily frustration the most — before spending on refinements like premium surfaces or lighting aesthetics.

    Buying used or off-brand narrows the gap between tiers

    Monitor arms and desk accessories are one of the more forgiving categories for off-brand or sale purchases, since the core mechanism doesn’t vary as dramatically in quality as, say, electronics. Shopping sales within a category can effectively move a $150 result into a $50-$100 actual spend.

    Mid tier desk mat and keyboard setup

    Bottom line

    The $150 tier delivers the best ratio of visible improvement to money spent for most people, mainly because it’s the first tier that can address both monitor height and lighting together. Spend there first if budget is limited, and treat $300+ upgrades as refinement rather than necessity.

  • USB Hub vs Docking Station: Which Do You Need for Your Setup

    USB Hub vs Docking Station: Which Do You Need for Your Setup

    This post contains affiliate links. If you buy through these links, we may earn a commission at no extra cost to you.

    USB hubs and docking stations solve overlapping problems, and it’s easy to buy the wrong one for what you actually need. Here’s the real difference and how to tell which one fits your setup.

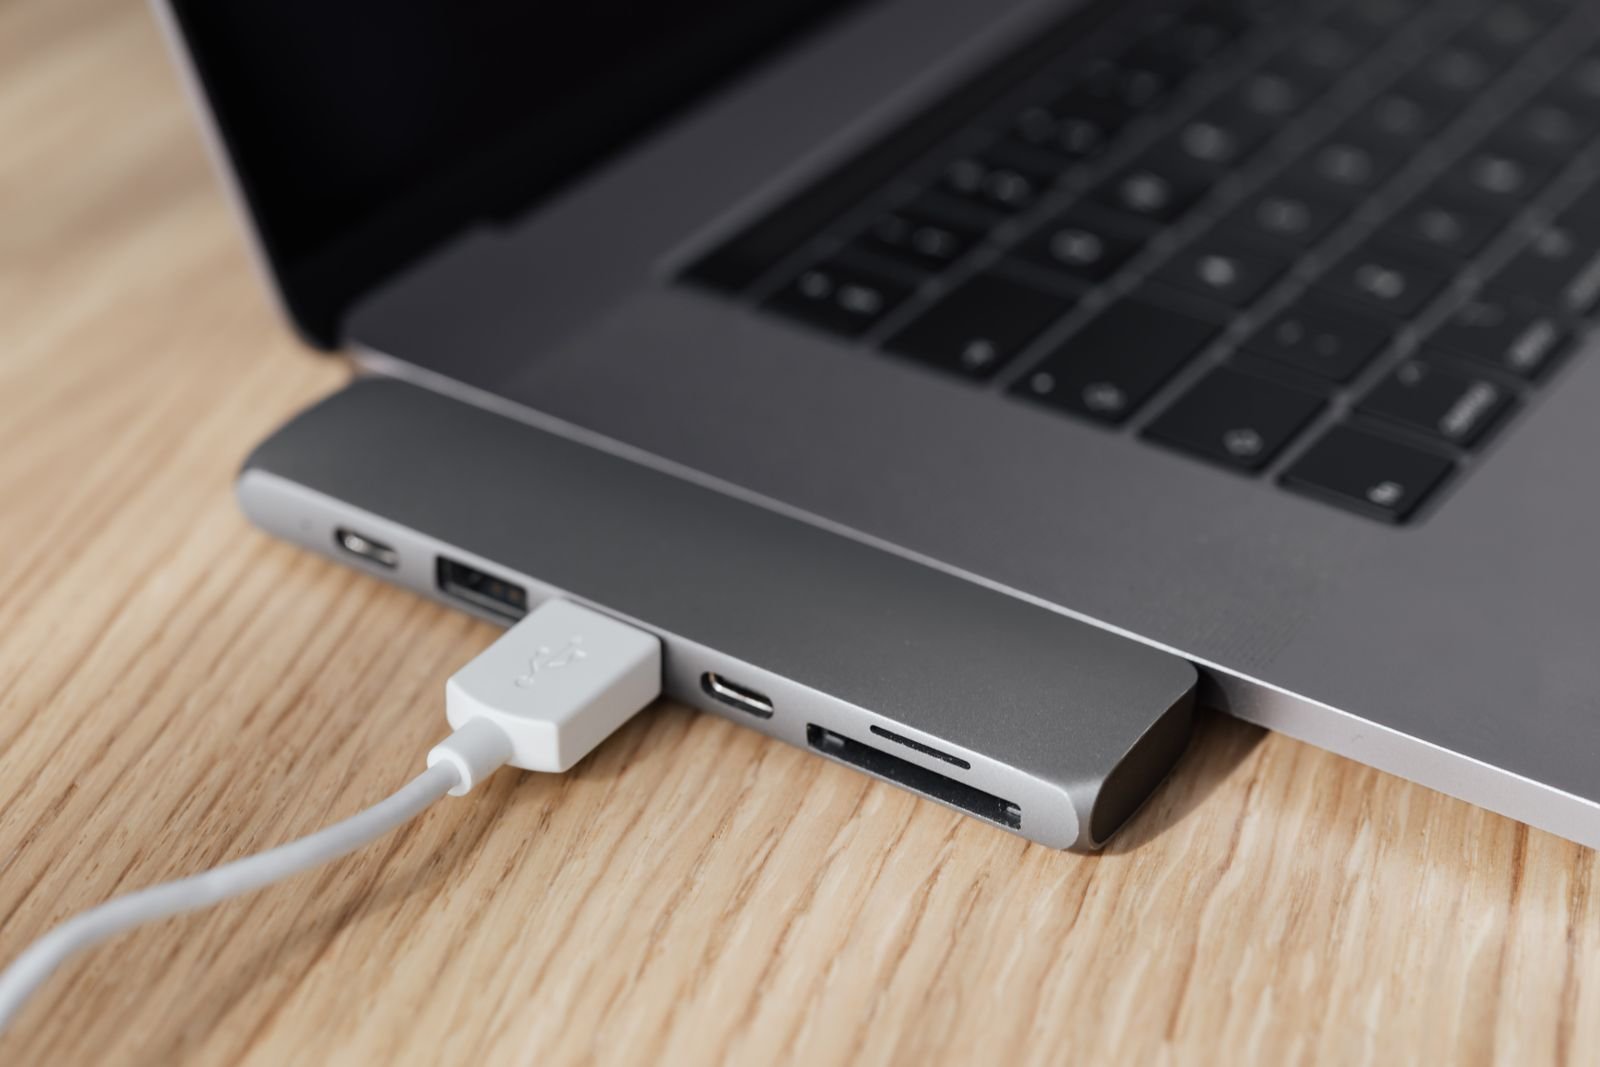
    USB C hub and docking station

    Our pick: 8-in-1 USB-C hub/docking station with 4K HDMI and PD. (affiliate link)

    What a USB hub actually does

    A USB hub is essentially a port multiplier — it takes one USB connection from your laptop and splits it into several USB ports, sometimes with an SD card reader or a couple of other basics added in. It’s cheap, small, and solves the simple problem of “I need more USB ports than my laptop has.”

    What a docking station adds on top

    A docking station does everything a hub does, plus video output (often multiple monitor support), higher-power charging for your laptop through the same cable, and sometimes wired ethernet. The tradeoff is a higher price and, on some models, drivers or software to get full functionality working.

    If you only need more ports, a hub is enough

    If your actual problem is “I plugged in a mouse and now I’m out of USB ports,” a simple hub solves it for a fraction of a docking station’s price. Buying a full dock for this alone is spending money on capability you won’t use.

    USB C hub power delivery to laptop

    If you connect and disconnect a laptop daily, a dock pays for itself

    The real value of a docking station shows up if you move a laptop between a desk setup and elsewhere regularly — instead of plugging in a monitor cable, power cable, and multiple peripherals separately every time, one dock cable handles all of it in a single connection. If you do this daily, the time saved adds up fast.

    Check your laptop’s actual port and power specs

    Not every laptop can be charged through the same USB-C port used for video and data, and not every dock delivers enough wattage for larger laptops. Check your laptop’s charging requirements and the dock’s rated power delivery before buying, especially for larger 15-16″ laptops that often need 90W or more.

    USB hub driving external 4K display

    Bottom line

    Buy a hub if you just need more ports occasionally; buy a dock if you connect and disconnect a laptop from a full desk setup regularly and want it down to one cable. Match the purchase to how often you actually dock, not to the longest feature list.

  • Desk Lamp Buying Guide: Brightness, Color Temp, and Placement

    Desk Lamp Buying Guide: Brightness, Color Temp, and Placement

    A desk lamp seems like the simplest purchase in a home office setup, but the wrong one leaves you squinting at a monitor or working under light that makes video calls look washed out. Here’s what actually separates a good desk lamp from one you’ll want to replace in a month.

    LED desk lamp with touch dimming

    Brightness matters more than wattage

    LED lamps are rated in lumens, not watts, and the number that matters is how much light actually reaches your desk surface — not the bulb’s raw output. For focused desk work, look for lamps in the 400-800 lumen range at typical working distance; anything much dimmer forces your eyes to strain, and anything much brighter without dimming can wash out your webcam.

    Adjustable color temperature beats a single fixed tone

    Cooler light (5000-6500K) reads as white-to-blue and helps with alertness and detail work like reading spreadsheets. Warmer light (2700-3000K) is easier on the eyes for long calls and evening work. A lamp that only offers one fixed temperature forces a compromise; one with adjustable temperature — even just 3 preset levels — lets you match the light to the task instead.

    Dimming quality is not optional

    Cheap dimmers can introduce a visible flicker, especially on camera during video calls, even if your eyes don’t consciously notice it. Stepless dimming or at least 5+ brightness steps gives you finer control than a basic 3-level toggle.

    LED desk lamps lineup

    Placement changes everything

    A lamp positioned directly in front of your monitor creates glare on the screen; one positioned too far to the side leaves half your desk in shadow. The sweet spot for most desks is slightly behind and to the side of your dominant hand, angled down at the work surface — this reduces both screen glare and shadow cast by your own hand while writing or typing.

    Clamp mount vs weighted base

    Clamp-mounted lamps free up desk surface and work well if your desk edge is accessible, but they can mark or dent softer desktop materials over time. Weighted-base lamps sit anywhere and are easy to reposition, but take up desk footprint. If your desk is already tight on space, a clamp mount is usually worth the tradeoff.

    Desk lamp touch dimming control

    Bottom line

    Prioritize adjustable color temperature and smooth dimming over raw brightness or a fancy design — those two features affect daily comfort more than anything else on the spec sheet. Everything else is largely personal preference.

  • Desk Organizer Types Explained: Trays, Drawers, and Risers

    Desk Organizer Types Explained: Trays, Drawers, and Risers

    This post contains affiliate links. If you buy through these links, we may earn a commission at no extra cost to you.

    “Desk organizer” covers a wide range of products that solve very different problems, and buying the wrong type is a common reason organizers end up unused in a drawer themselves. Here’s how the main categories differ and which one actually fits your situation.

    Hidden under-desk drawer organizer

    Trays: for things you touch constantly

    A desk tray — usually a shallow, open compartment or a set of them — is meant for items you reach for multiple times a day: pens, sticky notes, a phone, small tools. Because trays are open, they only work well if you’re willing to keep them tidy; anything open tends to become a catch-all if you’re not intentional about what goes in it. Trays are the right choice when speed of access matters more than tidiness.

    Drawer organizers: for things you want out of sight

    Under-desk or attached drawer units add closed storage without taking up desktop surface area, which makes them the better option for anything you don’t need to see or reach constantly — chargers, cables you’re not using, documents, spare stationery. The main tradeoff is a small delay: opening a drawer takes a second longer than reaching for an open tray, which matters if you’re organizing items you use often.

    Monitor risers: dual-purpose storage

    A monitor riser lifts your screen to a more comfortable eye level while creating a storage gap underneath — often enough room for a keyboard, notebook, or small tray. This makes risers useful less as “organizers” in the traditional sense and more as a way to reclaim desk space that would otherwise sit empty under a monitor that’s already at the right height.

    Drawer organizer with small items

    Pegboards and wall-mounted organizers

    If desktop space is the real constraint, moving storage off the desk entirely with a pegboard or wall-mounted organizer can free up more usable surface area than any desktop tray or drawer. This works best for items that don’t need to be touched multiple times per hour, since reaching to a wall panel takes slightly more effort than reaching across a desk.

    How to actually choose

    Sort what’s currently cluttering your desk into two piles: things you use several times a day, and things you use occasionally but still want nearby. The first pile belongs in a tray or an easily reachable spot; the second pile belongs in a drawer, riser storage gap, or wall organizer. Buying one organizer type and expecting it to handle both categories is usually why organizers stop getting used within a few weeks.

    Example picks: a 7-piece drawer organizer set for the drawer category above, or a no-drill under-desk hidden organizer if you want extra storage without giving up drawer space. (affiliate link)

    Drawer organizer with pens and tools

    Bottom line

    There’s no single best desk organizer — there’s only a best fit for how often you touch a given item. Match access frequency to storage type first, and the specific product you buy matters much less.

  • The Complete Guide to Cable Management Under Your Desk

    The Complete Guide to Cable Management Under Your Desk

    This post contains affiliate links. If you buy through these links, we may earn a commission at no extra cost to you.

    Cable management is one of those desk upgrades that doesn’t show up in photos but changes how a workspace actually feels to use. A tangled mess under the desk makes cleaning harder, hides dust, and makes it harder to trace a problem when something stops working. Here’s a practical approach that doesn’t require rebuilding your whole setup.

    Under-desk cable management tray

    Start by grouping, not hiding

    The instinct is to shove everything out of sight, but the more useful first step is grouping cables by function — power cables together, data cables (USB, HDMI, Ethernet) together, and anything you unplug often kept separate and accessible. Once cables are grouped, hiding them becomes much easier because you’re working with two or three bundles instead of a dozen loose wires.

    Use a cable tray to get wires off the floor

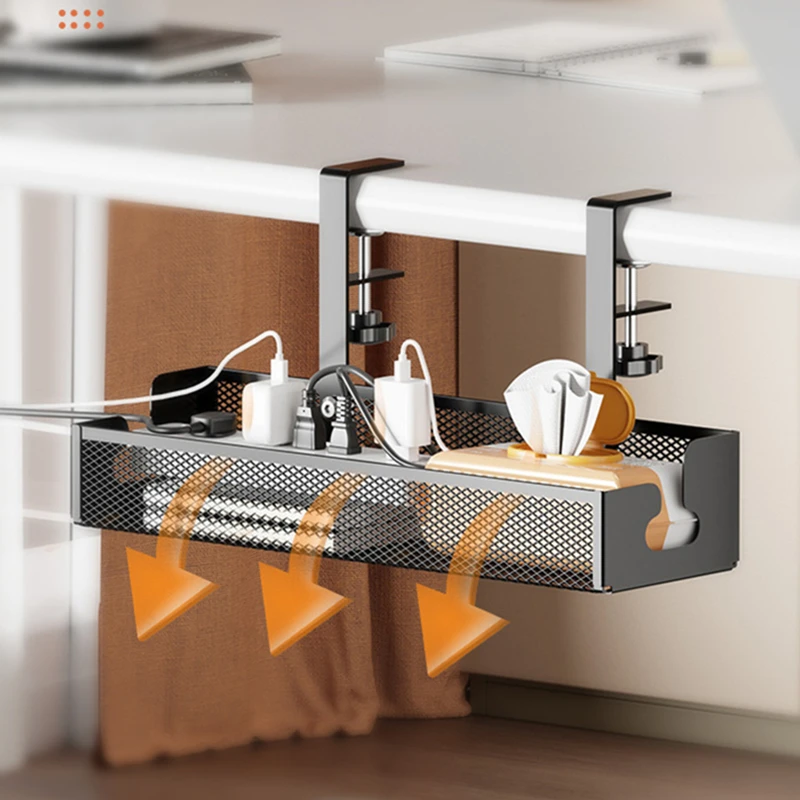
    An under-desk cable tray, usually a mesh or solid basket that clips or screws to the underside of the desktop, gives you a single place to route power strips and excess cable length. This does two things: it keeps cords off the floor where they collect dust and get kicked, and it moves the “mess” out of your eyeline entirely since you’re not looking under the desk during the day.

    Route, don’t just bundle

    Adhesive cable clips along the back edge or leg of the desk let you route cables in a fixed path rather than letting them hang loose. This matters most for cables that run from your desktop down to a power strip — a clean vertical run along a desk leg looks far better than cables dangling in open air, and it also reduces strain on the ports they’re plugged into.

    Under-desk cable tray holding items

    Deal with the power strip separately

    Power strips are usually the ugliest part of any desk setup because every cable eventually funnels into one. Mounting the power strip itself to the underside of the desk or inside a cable tray keeps it off the floor and out of sight, and makes it much easier to switch devices on and off without reaching around blindly.

    Label anything you might unplug

    Once cables are bundled and routed, it’s easy to forget which is which. Simple cable labels or even masking tape with a marker at each end save real time later when you need to unplug one specific cable without pulling the whole bundle apart to find it.

    Don’t over-bundle

    It’s tempting to zip-tie everything into one tight bundle, but overly tight bundling can strain individual cables and makes future changes harder — adding or removing one device means undoing the whole bundle. Velcro cable ties are worth the small extra cost over zip ties for exactly this reason: they’re reusable and adjustable.

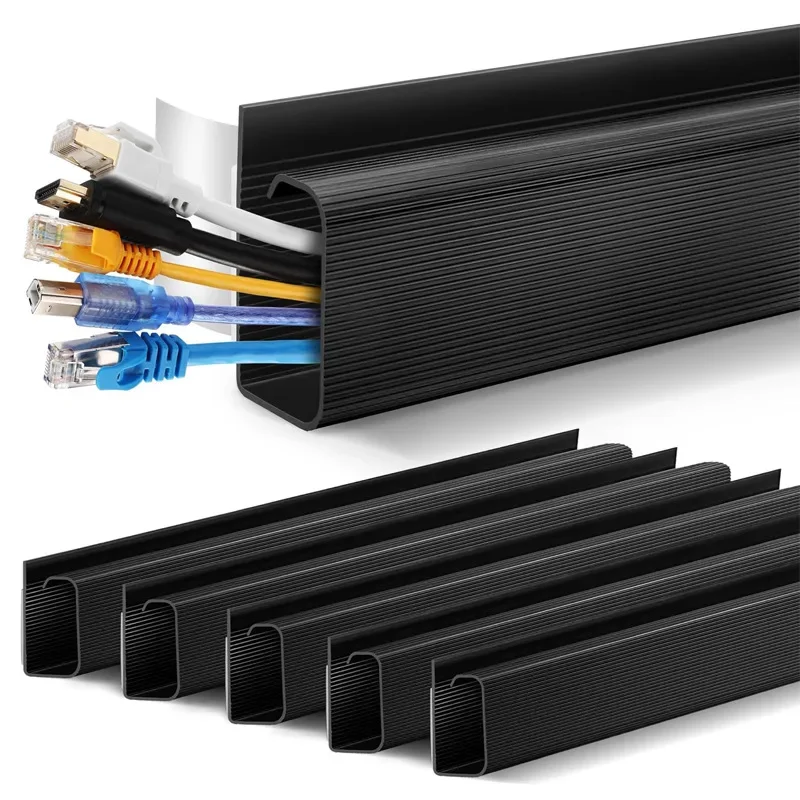
    Example picks: a no-drill under-desk cable tray to get the power strip and bulk of the wiring off the floor, plus a PVC cable raceway for routing the last few cables along a fixed, hidden path. (affiliate link)

    PVC cable raceway duct

    Bottom line

    Good cable management isn’t about hiding every wire perfectly — it’s about creating a repeatable system: group by function, route along a fixed path, get everything off the floor, and keep it loose enough to modify later. Once that system is in place, adding a new device to your desk takes minutes instead of becoming a full afternoon project.

  • Single vs Dual Monitor Arm: Which One Do You Actually Need?

    Single vs Dual Monitor Arm: Which One Do You Actually Need?

    This post contains affiliate links. If you buy through these links, we may earn a commission at no extra cost to you.

    If you’re setting up two monitors, one of the first decisions is whether to buy a dual-monitor arm on a shared base or two separate single arms. They look similar in photos but behave very differently on your desk.

    Dual monitor arm holding two screens

    How a dual arm works

    A dual monitor arm mounts both screens to a single vertical pole, usually with a crossbar or two arms branching off one base. This means one clamp point on your desk instead of two, which is useful if desk space or clamp room is tight. The tradeoff is that adjusting the height of the whole rig can shift both monitors at once, and the base itself takes up a fixed amount of depth right where it clamps on.

    How two single arms work

    Two independent single arms each get their own clamp and their own full range of motion. You can angle one monitor toward you for focused work and swing the other one flat or away when you’re not using it — something a shared dual arm usually can’t do as cleanly. The cost is two clamp points on your desk edge, which can be a problem on narrower desks or desks where the mounting area is limited.

    When a dual arm makes more sense

    If your monitors are the same size and you mostly want them sitting side by side at a fixed angle — a common setup for spreadsheet work, coding, or general multitasking — a dual arm is usually simpler to install and tidier looking, since there’s only one pole and one set of cables to manage.

    Dual monitor arm decluttering desktop

    When two single arms make more sense

    If your monitors are different sizes, if you frequently rotate one into portrait mode, or if you like to angle one screen toward a webcam or a second person, independent arms give you the flexibility to do that without fighting the mechanism. Streamers, video editors, and anyone who reconfigures their desk often tend to prefer this setup.

    Desk space is the deciding factor for most people

    On a desk under about 45 inches wide, two separate clamp points can start to feel cramped, especially if you also have a keyboard tray or other clamp-mounted accessories competing for edge space. In that situation, a dual arm’s single mounting point is the more practical choice even if you’d otherwise prefer the flexibility of two arms.

    Example picks: a dual monitor arm on a shared base if your screens mostly stay side by side, or a single monitor arm (buy two) if you want each screen to move independently. (affiliate link)

    Dual monitor arm swivel and tilt range

    Bottom line

    Neither option is objectively better — it comes down to how much you move your screens day to day and how much clear desk edge you actually have. If you’re not sure, picture your daily use: do you constantly re-angle one monitor, or do they basically stay put once set? That answer usually makes the decision for you.

  • How to Choose the Right Monitor Arm for Your Desk (Buying Guide)

    How to Choose the Right Monitor Arm for Your Desk (Buying Guide)

    This post contains affiliate links. If you buy through these links, we may earn a commission at no extra cost to you.

    A monitor arm looks like a simple accessory until you actually try to buy one. Between VESA standards, weight ratings, clamp types, and arm mechanisms, it’s easy to end up with something that either can’t hold your screen or won’t fit your desk at all. Here’s what actually matters before you buy.

    Single monitor arm mounted on a desk edge

    Measure your desk edge first

    Most monitor arms mount with a clamp that grips the back edge of your desk, and clamps have a maximum thickness they can grip — usually somewhere between 1.5 and 3.5 inches. Glass desks, very thick executive desks, and desks with a lip or trim can all cause fit problems. If your desk has an open back edge with no bracing underneath, a clamp mount will work fine. If it doesn’t, you’ll need a grommet mount instead, which goes through a drilled hole in the desktop.

    Check VESA compatibility

    Almost every monitor sold in the last decade has a VESA mounting pattern on the back — usually 75x75mm or 100x100mm for standard monitors, with wider patterns for ultrawide and larger screens. Check your monitor’s spec sheet for its VESA size before buying an arm, since not every arm supports both patterns out of the box.

    Match the weight rating to your actual monitor

    Every arm lists a weight range it can support, and gas-spring arms in particular need the monitor weight to fall within that range to move smoothly. Too light and the arm may drift upward on its own; too heavy and it will sag or refuse to hold position. If you plan to upgrade to a bigger monitor later, it’s worth buying an arm rated for more weight than you currently need.

    Monitor arm VESA mount close-up

    Gas spring vs friction arm

    Gas spring arms let you adjust height and angle with one hand and very little resistance, which is nice if you switch between sitting and standing often. Friction arms rely on tightened joints instead of a gas cylinder — they’re usually cheaper and hold position well once set, but adjusting them takes a bit more effort each time. If you rarely reposition your monitor once it’s set up, a friction arm is often the better value.

    Think about range of motion, not just height

    A good arm should let you pull the monitor closer or push it back, tilt it up or down, swivel it side to side, and rotate it into portrait mode if you want. Cheaper arms sometimes skip depth adjustment (extending forward and back), which matters more than people expect once the monitor is actually mounted — you’ll often want it slightly closer than you’d guess.

    Single vs dual clamp base

    If you’re running two monitors, decide early whether you want one dual arm on a shared base or two separate single arms. A shared base saves desk space but means both monitors move somewhat together; two independent arms give each screen full freedom of movement at the cost of an extra clamp point on your desk.

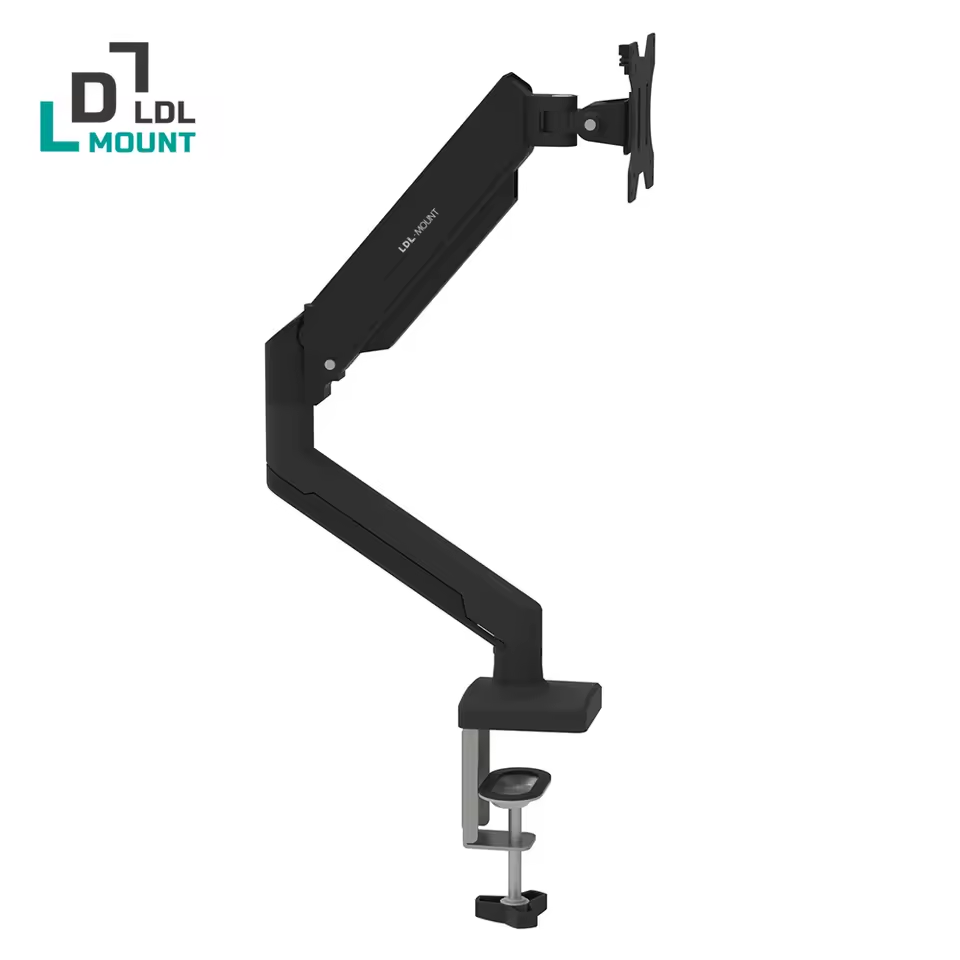
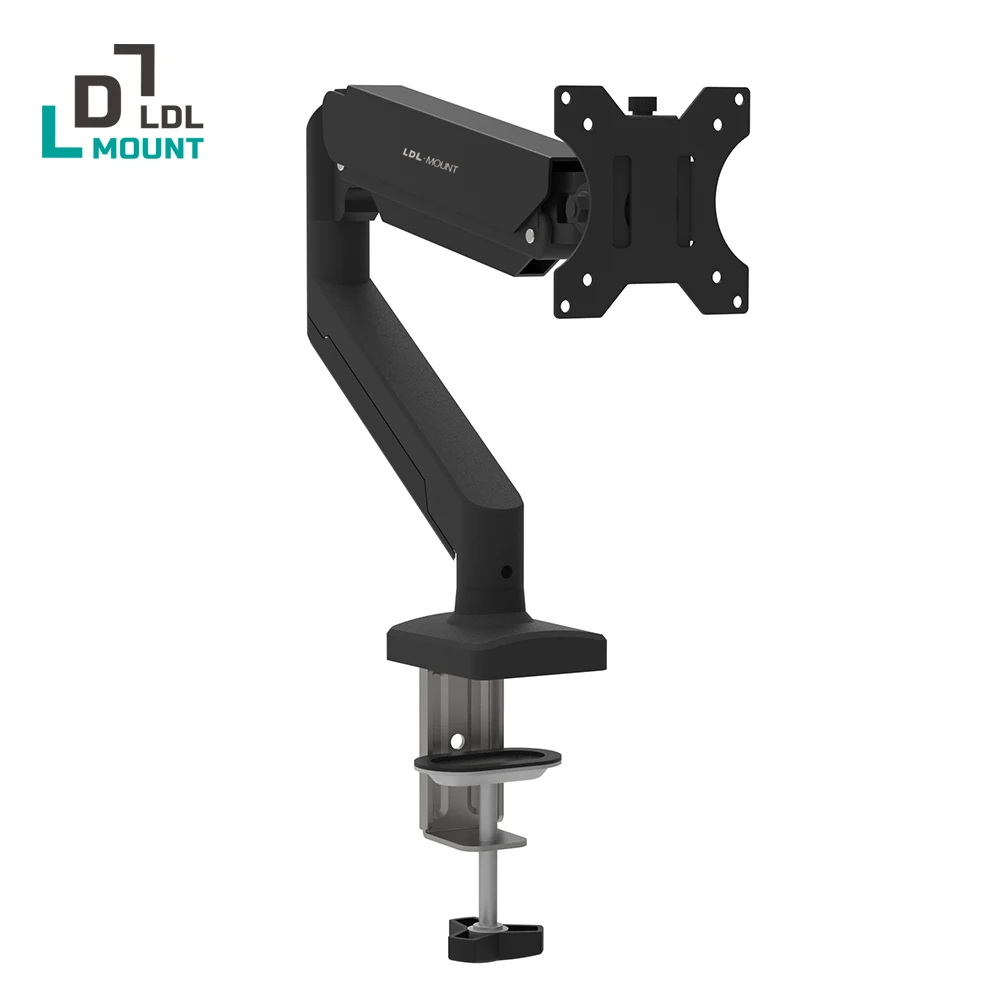
    Example pick: if you want a specific gas-spring arm to start with, the LDL-MOUNT Flex Fit single monitor arm covers the 17″-32″ range most people need. (affiliate link)

    Dual monitor arm for comparison

    Bottom line

    Before you add anything to your cart, confirm three things: your desk’s edge thickness and clearance underneath, your monitor’s VESA pattern, and your monitor’s weight versus the arm’s rated range. Get those three right and almost any reasonably built arm will serve you well for years.