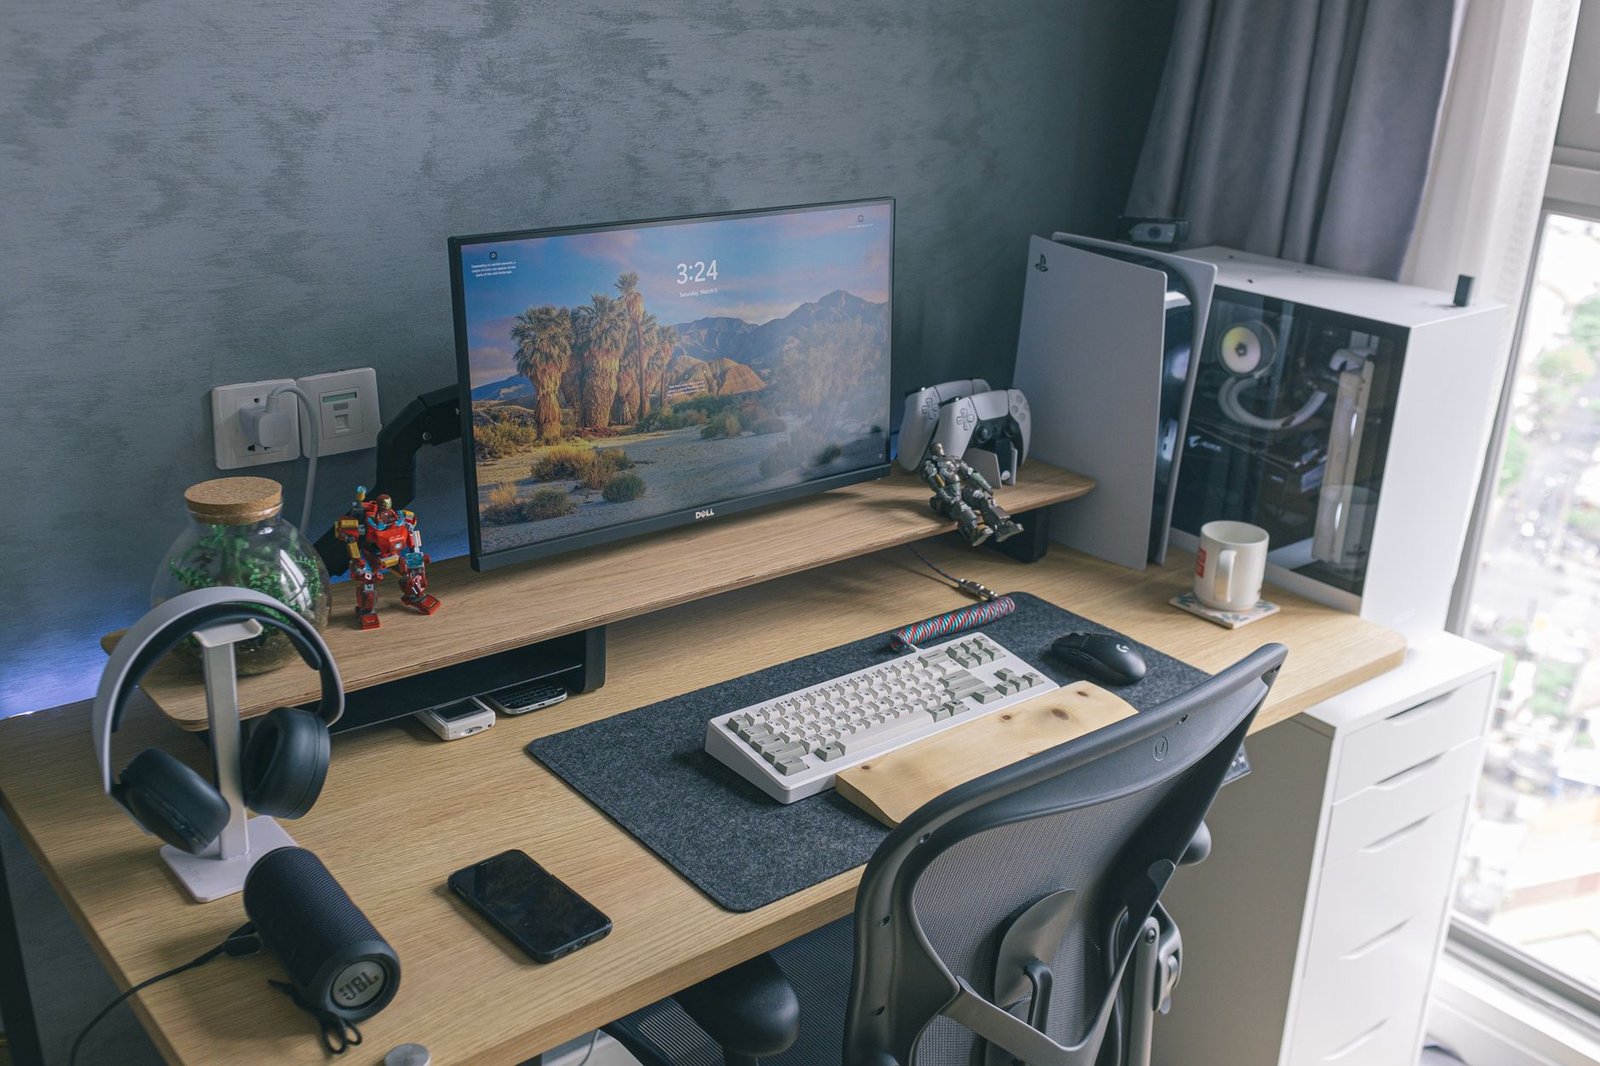
Category: Monitor Arms

  • How Much Weight Can a Monitor Arm VESA Mount Actually Hold?

    How Much Weight Can a Monitor Arm VESA Mount Actually Hold?

    This article includes affiliate links. We may earn a commission on qualifying purchases, at no additional cost to you.

    VESA mounts are the standardized screw-hole patterns on the back of monitors that let you attach them to arms, stands, and wall brackets. But just because a monitor has VESA holes doesn’t mean any arm can hold it safely. Understanding VESA weight ratings—and how they interact with your monitor arm’s capacity—can prevent expensive accidents and ensure your setup stays secure.

    This FAQ breaks down the most common questions about VESA mount weight limits, compatibility, and safe installation practices for monitor arms.

    What do VESA weight ratings actually mean?

    VESA (Video Electronics Standards Association) defines mounting patterns—75×75mm, 100×100mm, and so on—but the organization doesn’t certify weight limits. The weight capacity you see advertised comes from the monitor arm manufacturer, not the VESA standard itself. A monitor arm rated for 20 pounds means the gas spring, joints, and hardware can safely support that load when properly installed.

    Your monitor’s weight should fall comfortably within the arm’s stated range. Going right up to the maximum often results in sagging over time, even if it doesn’t fail outright. Based on published specifications and customer feedback, keeping your monitor at least 2-3 pounds below the arm’s upper limit provides better long-term performance and smoother adjustment.

    Can I use a 100×100 VESA arm with a heavier 200×200 monitor?

    VESA pattern size and weight capacity are separate considerations. A 100×100mm pattern just means four screw holes spaced 100mm apart horizontally and vertically. A monitor with that pattern could weigh 8 pounds or 18 pounds—the pattern doesn’t tell you the weight. Similarly, a 200×200mm monitor isn’t necessarily heavier; it’s just physically larger and needs wider spacing for structural balance.

    Most monitor arms support multiple VESA patterns (75×75, 100×100, sometimes 200×200) through adjustable adapter plates. What matters is whether the arm’s weight capacity matches your monitor’s actual weight, regardless of the screw pattern. Always check both the VESA compatibility and the weight range before purchasing. If you’re managing cables alongside your arm installation, hiding cords properly keeps your setup looking clean and professional.

    What happens if I exceed the weight limit slightly?

    Exceeding a monitor arm’s weight capacity—even by a few pounds—typically causes gradual sagging rather than sudden collapse. Gas springs lose their lift force, tension knobs stop holding position, and you’ll find your monitor drifting downward throughout the day. In more extreme cases, the desk clamp can loosen, screws can strip, or joints can crack under sustained stress.

    Based on customer feedback, arms that are overloaded often require constant re-tightening and never quite hold position reliably. If your monitor weighs more than the arm’s rating, it’s worth investing in a higher-capacity model rather than fighting with an inadequate one. We’ve covered how monitor arms can damage desks if improperly installed or overloaded, so matching capacity to weight protects both your monitor and your furniture.

    Do single and dual monitor arms have different weight rules?

    Yes. A dual monitor arm (affiliate link) typically lists weight capacity per arm, not total. If each arm supports up to 17.6 pounds, you can mount two monitors as long as neither exceeds that individual limit—the total combined weight could be 35 pounds, but each monitor must stay within its own arm’s range.

    Balance also matters. Mounting one heavy monitor and one lightweight one on a dual arm can create uneven tension and stress on the center post. For the smoothest operation, try to keep both monitors within a few pounds of each other. Single arms are simpler: one weight limit, one monitor, no balancing required.

    Should I weigh my monitor before buying an arm?

    Absolutely. Manufacturer spec sheets often list monitor weight, but not all do—and the listed weight sometimes excludes the stand. Use a bathroom scale or kitchen scale to confirm your monitor’s actual weight, including any attached cables or accessories you plan to leave connected. Add a small margin for safety.

    If you’re upgrading to a monitor arm as part of a larger desk refresh, consider whether other accessories might streamline your workspace at the same time. A well-chosen arm frees up desk real estate, but only if you pick one with the right capacity for your specific monitor.

  • Can You Adjust a Monitor Arm After Installation? (Movement, Tightness & Repositioning)

    Can You Adjust a Monitor Arm After Installation? (Movement, Tightness & Repositioning)

    This article includes affiliate links. We may earn a commission on qualifying purchases, at no additional cost to you.

    One of the biggest advantages of investing in a monitor arm is flexibility—but that flexibility only matters if you can actually adjust the arm when you need to. Whether you’re tweaking your screen height for better posture, repositioning your monitor for a video call, or simply trying to tighten a loose joint, understanding how monitor arms adjust after installation is crucial.

    The short answer: yes, virtually all monitor arms are designed to be adjusted after installation. But the ease of adjustment, the range of motion, and the tools required vary widely depending on the type of arm, the tension mechanism, and how well it’s maintained. Here’s what you need to know.

    Can you move the monitor freely once the arm is installed?

    Most monitor arms are designed for frequent repositioning. Gas-spring arms and friction-based arms both allow you to move the monitor up, down, forward, backward, and side-to-side without tools—assuming the tension is properly calibrated. You should be able to gently push or pull your monitor into a new position and have it stay there.

    If your monitor drifts downward or feels too stiff to move, the tension needs adjustment. Gas-spring models typically have a hex-key adjustment point (often on the arm’s vertical post), while friction arms use thumbscrews or Allen screws at the joints. Check your arm’s manual for the exact location and tool size—most use a 4mm, 5mm, or 6mm hex key.

    How do you tighten a monitor arm that’s sagging or drifting?

    Sagging is the most common issue with monitor arms, especially if your monitor is near the weight limit or the arm has been in use for a while. For gas-spring arms, locate the tension adjustment screw (usually marked with a “+” and “–” symbol) and turn it clockwise in small increments—quarter-turns at a time—until the monitor holds position without drifting.

    For friction-based arms, tighten the screws at each joint where movement occurs. Be careful not to overtighten, as this can strip threads or make the arm completely immovable. Test after each adjustment to find the sweet spot where the monitor moves smoothly but stays in place when released.

    Can you reposition the arm’s base or clamp after it’s mounted?

    Yes, but it requires partial disassembly. If you need to move the clamp to a different spot on your desk or switch from clamp to grommet mounting, you’ll need to loosen the base fasteners, reposition, and retighten. This usually means removing the monitor from the arm first to reduce weight and avoid stress on the joints.

    Keep in mind that moving the base may affect cable routing if you’ve already organized your wires. If you’ve invested in a tidy setup with cable sleeves or trays, you may need to redo part of that work after repositioning the arm.

    What if the arm won’t stay in position no matter how much you tighten it?

    If tightening the tension screws doesn’t solve the problem, your monitor may be too heavy for the arm’s capacity, or the internal mechanism may be worn out. Check the arm’s weight rating against your monitor’s actual weight (including the VESA mount bracket). If you’re over the limit, the arm will struggle to hold position reliably.

    In some cases, gas springs lose pressure over time, especially in budget models. If your arm is several years old and no longer holds tension even when fully tightened, it may be time to replace it. Based on customer feedback, most quality arms maintain their tension for 3–5 years under normal use, but cheaper models may degrade faster.

    Do you need to readjust monitor arms seasonally or over time?

    Generally, no—but minor tweaks aren’t uncommon. Temperature fluctuations can slightly affect gas pressure in spring-loaded arms, and regular use can cause joints to loosen. If you notice your monitor slowly creeping downward over weeks or months, a quick quarter-turn adjustment usually brings it back to normal.

    If you’re setting up a minimalist desk or frequently rearrange your workspace, consider a single monitor arm with easy-access tension controls (affiliate link) so you can make adjustments without digging out tools every time.

  • Monitor Arm vs Monitor Stand: Which Should You Choose for Your Desk?

    Monitor Arm vs Monitor Stand: Which Should You Choose for Your Desk?

    This article includes affiliate links. We may earn a commission on qualifying purchases, at no additional cost to you.

    Deciding between a monitor arm and a traditional monitor stand is one of the first choices you’ll face when upgrading your desk setup. Both raise your screen to eye level, but they work differently and suit different needs. This FAQ breaks down the practical differences so you can pick the right option for your workspace.

    What’s the main difference between a monitor arm and a monitor stand?

    A monitor stand is a fixed platform that sits on your desk surface. It lifts your monitor to a set height—either the height it comes with or one you adjust using risers or adjustable models. It stays in one position once you place it.

    A monitor arm clamps or mounts to your desk edge and holds your screen on an articulating arm. You can tilt, swivel, rotate, and adjust height throughout the day. The monitor floats above your desk rather than sitting on it, freeing up surface space underneath.

    The core trade-off: stands are simpler and cheaper; arms offer flexibility and reclaim desk real estate.

    When does a monitor stand make more sense?

    Monitor stands work well if you have a fixed viewing position and don’t need to adjust your screen often. They’re ideal for smaller budgets, rental situations where you can’t or don’t want to clamp hardware to the desk, and setups where desk space isn’t at a premium.

    Stands also suit glass desks or thin surfaces that may not support clamp-style mounts safely. If you’re working in a compact area and already managing small home office layouts, a low-profile stand can provide the lift you need without adding bulk or requiring installation.

    Based on customer feedback, stands are popular with users who value simplicity and want a plug-and-play solution with no assembly complexity.

    When should you choose a monitor arm instead?

    Monitor arms excel when you need flexibility. If you switch between sitting and standing, share your desk with someone else, or frequently shift between tasks that require different screen angles, an arm pays off quickly.

    Arms also matter if desk space is tight. Lifting your monitor off the surface creates room underneath for notebooks, a keyboard tray, or better access to cable management behind your desk. For dual-monitor setups, a dual monitor arm (affiliate link) consolidates two screens onto one mount, reducing clutter and improving alignment.

    Based on published specs and user reviews, gas-spring arms (rather than mechanical or fixed arms) provide the smoothest adjustments and hold position reliably across a range of monitor weights.

    Are there any downsides to monitor arms?

    Monitor arms require a stable desk with enough thickness and edge clearance for clamp or grommet mounting—typically at least 0.75 inches thick and 2-4 inches of clearance behind the desk edge. Some desks with built-in cable channels or uneven edges won’t accommodate standard clamps.

    Installation takes more effort than dropping a stand on your desk. You’ll need to route cables along the arm, adjust tension settings, and occasionally retighten the clamp. Arms also cost more upfront—usually $80–$200 for quality models versus $20–$60 for basic stands.

    If your monitor exceeds the arm’s weight rating or VESA mount compatibility, you’re out of luck. Always check specs before buying.

    Can you switch between a stand and an arm later?

    Yes. Most monitors support VESA mounting (75mm or 100mm patterns), so you can start with a stand and upgrade to an arm later without replacing your monitor. The reverse works too—if you move to a desk that doesn’t support arms, you can revert to a stand.

    Keep your original monitor base if it came with one. Many users store it when switching to an arm, then pull it back out when moving or changing setups. This flexibility means your initial choice isn’t permanent, so it’s okay to start with the simpler, cheaper option and upgrade as your needs evolve.

  • Do Monitor Arms Damage Desks? (Common Risks and How to Prevent Them)

    Do Monitor Arms Damage Desks? (Common Risks and How to Prevent Them)

    Heads up: some links in this post are affiliate links, which means we may earn a small commission if you make a purchase — at no extra cost to you.

    Monitor arms are one of the most practical upgrades for a home office setup, but many people hesitate because they worry about damaging their desk. The concern is valid—clamp-style and grommet-mount arms do put pressure on your desk surface, and poor installation or incompatible materials can leave lasting marks or structural damage.

    Understanding what can go wrong and how to prevent it will help you install a monitor arm confidently without compromising your furniture. Here are the most common questions about monitor arm damage and how to protect your desk.

    Can a monitor arm crack or dent my desk?

    Yes, especially if your desk is made from particleboard, MDF, or thin laminate. Clamp-style monitor arms apply concentrated pressure to a small area on the edge of your desk. If the desk material is soft or the top is too thin (under ¾ inch), the clamp can compress the material, leaving permanent indents or even cracks over time.

    Glass desks are particularly vulnerable. Even tempered glass can crack under uneven pressure from a clamp, which is why choosing the right monitor arm for your desk material is critical.

    To prevent damage, check your desk thickness before buying. Most quality monitor arms require at least a ¾-inch to 2-inch thick desktop. Use the protective pads that come with the arm, and tighten the clamp gradually—over-tightening is a common cause of compression damage.

    Will a grommet-mount monitor arm leave a permanent hole in my desk?

    Yes, grommet mounts require drilling a hole (typically 3/8 inch to 1 inch in diameter) through your desktop. This hole is permanent, so you need to be certain about placement before drilling. If you move or remove the arm later, you’ll have a visible hole that may affect resale value or aesthetics.

    That said, grommet mounts distribute weight more evenly than clamps and put less surface pressure on your desk, making them a better choice for heavier monitors or thinner desks. If you’re renting or want flexibility, a clamp-style arm is reversible. If you own your desk and want maximum stability, the grommet trade-off is usually worth it.

    Can monitor arms scratch or scuff my desk surface?

    They can, particularly during installation or adjustment. The metal clamp plate or grommet base can scrape against your desk finish if you slide it around. Some cheaper arms skip protective rubber or felt pads entirely, leaving bare metal in contact with your desktop.

    Before installing, confirm your monitor arm includes padding on all contact points. If it doesn’t, add adhesive felt pads or rubber bumpers yourself. Clean the desk surface before clamping to avoid trapping debris that could scratch the finish. Once installed, avoid repositioning the clamp unless necessary.

    What’s the safest way to install a monitor arm without damage?

    Start by confirming compatibility. Measure your desk thickness and edge depth, and verify the monitor arm’s clamp or grommet specifications match. Most arms work with desks ¾ to 2 inches thick and require at least 2 inches of clearance behind the edge.

    Use all included protective pads and spacers. Position the clamp slowly and tighten evenly—don’t crank it down all at once. For grommet installations, drill carefully using the correct bit size and cover sharp edges with the included grommet ring. If you’re unsure about your desk’s durability, consider a freestanding monitor arm base that sits on top of your desk without clamping.

    If you’ve already invested in ergonomic desk accessories and cable management, protecting your desk during monitor arm installation ensures your entire setup stays clean and professional-looking for years.

    Are there monitor arm alternatives that cause zero desk damage?

    Yes. Freestanding monitor arm bases use a weighted platform that sits on your desktop without clamping or drilling. They’re ideal for glass desks, thin surfaces, or rental situations where you can’t modify furniture. The trade-off is that they take up desk real estate and may be less stable than clamp or grommet mounts.

    Wall-mounted monitor arms are another option if you have stud access and don’t mind drilling into your wall. They eliminate all pressure on your desk but limit flexibility if you rearrange your office layout. Based on customer feedback, freestanding bases work well for lightweight monitors (under 15 pounds), while wall mounts are better for permanent setups with heavier displays.

  • Monitor Arm Weight Limits: What Happens If You Go Over?

    Monitor Arm Weight Limits: What Happens If You Go Over?

    This post contains affiliate links. If you buy through these links, we may earn a commission at no extra cost to you.

    Most monitor arms list a weight capacity—typically between 4.4 and 22 pounds—but what actually happens if you mount a heavier display? And how much safety margin do those ratings really have? Understanding weight limits helps you avoid damaging your equipment, your desk, or creating an unsafe setup that could fail unexpectedly.

    This FAQ walks through the practical considerations around monitor arm weight ratings, how to verify your monitor’s actual weight, and what to do if you’re close to the limit.

    What exactly does the weight limit on a monitor arm mean?

    The weight limit is the maximum load the manufacturer has tested and certified the arm to support safely. This figure accounts for the monitor’s weight plus the mechanical stress from extension, rotation, and repeated adjustments over time. It’s not just about whether the arm can hold the weight statically—it’s whether it can do so reliably while you tilt, swivel, and reposition the screen throughout the day.

    Most quality arms include a small safety buffer beyond the stated limit, but that margin isn’t disclosed and shouldn’t be relied upon. Exceeding the rating voids warranties and increases the risk of gradual sag, joint failure, or sudden collapse.

    How do I find out how much my monitor actually weighs?

    Check the manufacturer’s spec sheet or product page—monitor weight is almost always listed, typically without the stand. That’s the number you need, since you’ll be removing the stock stand to mount it on the arm. If you can’t find official specs, search the model number plus “weight without stand” or use a kitchen scale to weigh it yourself after detaching the base.

    Don’t guess. A 27-inch monitor can weigh anywhere from 8 to 15 pounds depending on the panel technology and build quality. Ultrawide and gaming monitors with heavy bezels or built-in speakers often push past 20 pounds.

    What are the risks of mounting a monitor that’s slightly over the weight limit?

    The most common issue is gradual droop. The gas spring or tension mechanism can’t maintain position under excess load, so the monitor slowly sinks even when locked. You’ll find yourself readjusting it multiple times a day, which defeats the ergonomic benefit of having an arm in the first place.

    Worse risks include joint failure at the pivot points, cracking or bending of the clamp or grommet mount, and in extreme cases, the arm detaching entirely and dropping your monitor. Based on customer feedback across monitor arm reviews, failures don’t always happen immediately—they can develop over weeks or months as metal fatigues and plastic components stress-crack.

    If your desk finish is delicate or you’re using a glass surface, an overloaded arm also increases pressure on the mounting point, which can cause cracking or permanent indentation. You’ll want to verify your desk can handle the extra stress before mounting a heavier display.

    What should I do if my monitor is heavier than most standard arms support?

    Look for heavy-duty or “large display” monitor arms rated for 22–35 pounds. These use stronger gas springs, reinforced joints, and sturdier clamps. They’re bulkier and cost more, but they’re built for ultrawide, large-format, or gaming monitors that standard arms can’t handle safely.

    If you’re running two monitors and considering a dual arm, check the per-arm weight rating, not just the total. A dual monitor arm (affiliate link) rated for 17.6 pounds total typically supports 8.8 pounds per screen, so make sure each display falls within that individual limit.

    Is there any leeway, or should I treat the weight limit as absolute?

    Treat it as absolute for safety and warranty purposes. Manufacturers test to the rated limit under controlled conditions, and real-world use—especially frequent adjustments, desk vibration, or environmental factors like heat—adds stress that testing may not fully replicate. A monitor that’s 1–2 pounds over might work initially, but you’re gambling on long-term reliability and voiding any recourse if something fails.

    If you’re right at the edge, consider how often you’ll adjust the arm. Infrequent movement places less strain than daily repositioning. For setups where cable routing is already tight, an overloaded arm combined with poorly managed cables can add pull force that tips the balance toward failure.

  • Can You Use a Monitor Arm With a Glass Desk? What You Need to Know

    Can You Use a Monitor Arm With a Glass Desk? What You Need to Know

    Heads up: some links in this post are affiliate links, which means we may earn a small commission if you make a purchase — at no extra cost to you.

    Glass desks look sleek and modern, but they come with a unique challenge when you want to add a monitor arm. The clamp-style mounts that work perfectly on wood or laminate desks can crack or shatter glass if you’re not careful. Before you write off monitor arms entirely, there are solutions—you just need to understand the risks and know what precautions to take.

    This FAQ covers the most common questions about using monitor arms with glass desks, including what types work best, how to protect your surface, and when you should skip the mount altogether.

    Can you safely mount a monitor arm on a glass desk?

    Yes, but only with the right precautions. Standard C-clamp monitor arms apply concentrated pressure to a small area, which can crack tempered glass. To distribute that force, you need to use protective pads or mounting plates between the clamp and the glass surface. Many manufacturers include rubber pads, but for glass desks, you’ll want something more substantial—thick neoprene pads, silicone bumpers, or metal reinforcement plates work better.

    Grommet-style mounts that drill through the desk are generally not recommended for glass unless the desk was specifically designed with pre-drilled mounting holes. Drilling tempered glass yourself will almost certainly shatter it.

    What’s the safest type of monitor arm for a glass desk?

    Freestanding monitor arms are the safest option because they don’t clamp onto the desk at all. These arms use a weighted base that sits on your desktop, eliminating any pressure points that could crack glass. The tradeoff is that freestanding models take up desk real estate and typically cost more than clamp-style arms.

    If you prefer a clamp mount, look for models with large, flat clamp surfaces rather than narrow edges. A single monitor arm (affiliate link) with wide rubber-coated clamps will distribute weight more evenly than compact designs. Dual arms carry more weight, so extra reinforcement becomes even more critical.

    How thick does a glass desk need to be for a monitor arm?

    Most monitor arm manufacturers specify a minimum desk thickness between 0.4 and 3 inches. For glass desks specifically, thicker is always safer—ideally at least half an inch (12-15mm) of tempered glass. Thinner glass lacks the structural strength to handle the clamping force and weight of a monitor arm, even with protective pads.

    Check your desk specifications before buying any mount. If your glass desk is less than 10mm thick or isn’t tempered glass, a freestanding arm is your only safe bet.

    What else should you consider before mounting on glass?

    Monitor weight matters. A 27-inch monitor can weigh 15-20 pounds, and when mounted on an articulating arm, that weight creates leverage that magnifies stress on the clamp point. If you’re running a dual-monitor setup, the combined load increases the risk significantly.

    Desk edge access is another factor. Some glass desks have metal or wood framing around the edges, which provides a much safer clamping surface than bare glass. If your desk has this type of reinforced edge, position the clamp there instead of on the glass itself.

    Also think about cable management under your desk—glass surfaces make it harder to hide cables, so you may need creative routing solutions to keep cords out of sight.

    When should you skip the monitor arm entirely?

    If your glass desk is thin, frameless, or you’re unsure whether it’s tempered, don’t risk it. A cracked desk is far more expensive than a monitor stand. Instead, use a traditional monitor stand or a monitor riser to achieve better ergonomic height without the mounting risk.

    Budget setups in small home offices may not justify the cost of a freestanding arm when a simple riser does the job. Save the monitor arm investment for a more mount-friendly desk surface.

  • Monitor Arm Compatibility FAQ: Will It Work With Your Desk and Monitor?

    Monitor Arm Compatibility FAQ: Will It Work With Your Desk and Monitor?

    Heads up: some links in this post are affiliate links, which means we may earn a small commission if you make a purchase — at no extra cost to you.

    Before you buy a monitor arm, you need to know whether it will actually work with your desk and monitor. Compatibility issues are the most common reason monitor arms get returned, and they’re almost always avoidable if you check a few key measurements first. This FAQ covers the most important compatibility questions so you can make a confident purchase.

    Will a monitor arm work with my desk thickness?

    Most monitor arms use a C-clamp that requires a desk thickness between 0.4 and 2.4 inches (roughly 10–60 mm). Measure the edge of your desk where you plan to mount the arm—not the entire desk surface if it has a hollow core or frame underneath. Glass desks, standing desks with thin tops, and some IKEA models fall outside this range and won’t work with standard clamps.

    If your desk is too thick, a grommet mount (which goes through a drilled hole) may be your only option. If it’s too thin or has a lip that interferes, look for arms that include extension brackets or support spacers. Based on published specifications and customer feedback, arms with adjustable clamp ranges offer the best flexibility for non-standard desks.

    How do I know if my monitor is compatible with VESA mounting?

    Check the back of your monitor for four screw holes arranged in a square pattern. The two most common VESA patterns are 75 × 75 mm and 100 × 100 mm. If you see these holes, your monitor is compatible with nearly every monitor arm on the market.

    Some ultrawide or gaming monitors use 200 × 200 mm patterns, which require heavier-duty arms. If there are no visible holes, consult your monitor’s manual or search “[monitor model] VESA compatible.” Apple Studio Displays, iMacs, and some all-in-one PCs do not support VESA without aftermarket adapters. Measure your monitor’s weight, too—most single arms support 4.4 to 19.8 lbs (2–9 kg), but confirm your monitor falls within the arm’s rated range.

    Can I use a monitor arm with a standing desk?

    Yes, but you need to account for the arm’s vertical range. When your desk rises, the monitor rises with it, so a short-travel arm may leave your screen too high when standing. Look for arms with at least 13–15 inches of vertical adjustment to accommodate sit-stand transitions without needing to reposition the arm itself.

    Electric standing desks with cable-management trays can also interfere with arm clamps. Make sure there’s a clear, flat section of desk edge where the clamp can grip securely. If you’re planning a full cord-free desk setup, mounting a monitor arm early helps you route cables cleanly before adding other accessories.

    What if my desk is against a wall or has limited depth?

    Standard monitor arms extend 15–20 inches from the clamp point. If your desk is shallow or pushed against a wall, the arm may not have enough room to swing back, leaving your monitor too far forward. Measure from the rear edge of your desk to where you want the monitor positioned—this is your usable depth.

    Low-profile or wall-mounted arms work better in tight spaces, but they sacrifice flexibility. If you’re working with a compact setup, consider how the arm’s footprint interacts with other desk elements. Pairing a properly sized monitor arm with smart cable management keeps everything functional without crowding your workspace.

    Do I need a single or dual monitor arm for my setup?

    If you’re running two monitors, a dual monitor arm (affiliate link) saves desk space and keeps both screens aligned at the same height. Make sure the combined weight of both monitors doesn’t exceed the arm’s capacity, and verify that both use the same VESA pattern for easier installation.

    Single arms offer more independent positioning but take up two clamp spots, which can be a problem on narrower desks. For side-by-side monitors of different sizes or brands, two single arms often provide better ergonomic control than a fixed dual-arm configuration.

  • How to Install a Monitor Arm: Step-by-Step Setup Guide

    How to Install a Monitor Arm: Step-by-Step Setup Guide

    This article includes affiliate links. We may earn a commission on qualifying purchases, at no additional cost to you.

    Installing a monitor arm can feel intimidating if you’ve never done it before, but the process is more straightforward than most people expect. Whether you’re trying to reclaim desk space, improve ergonomics, or just clean up cable clutter, a properly installed monitor arm makes a noticeable difference. This guide walks you through the setup process from start to finish, so you can mount your monitor safely and adjust it correctly the first time.

    What You’ll Need Before You Start

    Before you unbox your monitor arm, gather a few basic tools and confirm compatibility. Most monitor arms require a Phillips screwdriver, and some include an Allen wrench for tightening joints. Check that your monitor supports VESA mounting—look for four screw holes on the back, typically in a 75mm × 75mm or 100mm × 100mm pattern. Your monitor’s manual or manufacturer website will list the VESA size.

    You’ll also need to measure your desk thickness. Most arms clamp onto desks between 0.4 and 2.4 inches thick, but glass, marble, or ultra-thin desks may require a grommet mount instead of a clamp. If you’re working with a small home office setup, verify that you have enough clearance behind the desk for the arm’s base—usually about 4 to 6 inches.

    Removing the Monitor Stand

    Start by powering off your monitor and unplugging all cables. Lay the monitor face-down on a soft surface like a towel or blanket to avoid scratching the screen. Locate the screws that attach the factory stand to the monitor back. These are usually covered by a small plastic panel that pops off. Remove the screws, then carefully lift the stand away.

    Keep the original stand and screws in a labeled bag—if you move or sell the monitor later, you’ll want them. Some monitors have a quick-release mechanism instead of screws; consult your manual if you’re not sure which type you have.

    Attaching the Monitor Arm to Your Desk

    Position the arm’s clamp or grommet mount where you want it—typically near the back center of your desk. If using a clamp, tighten it gradually and evenly to avoid warping thin desktops. Place the included protective pad between the clamp and desk surface to prevent damage. For grommet mounts, you’ll need to drill a small hole through the desk, so measure twice and mark your spot carefully.

    Once the base is secure, attach the arm’s pole or gas spring to the mounting plate. Most designs use a quick-release bracket or a few hex bolts. Make sure everything is hand-tight before adding the monitor’s weight. This is also a good time to route cables through any built-in cable channels—doing it now saves frustration later, especially if you’re aiming for a minimalist desk setup.

    Mounting the Monitor and Adjusting Tension

    Attach the VESA mounting plate (included with your arm) to the back of your monitor using the screws provided. These screws should thread directly into the monitor’s VESA holes. Don’t overtighten—snug is enough. Then, lift the monitor and align the plate with the arm’s quick-release bracket. You should hear or feel a click when it locks into place.

    Now adjust the arm’s tension settings. Gas-spring arms usually have a tension knob or Allen key adjustment near the joint. If the monitor sags or drifts downward, increase tension; if it’s hard to move, decrease it. The goal is smooth, balanced movement that holds position without constant readjustment. Based on customer feedback, this step often requires a few tries to get right, so don’t rush it.

    Final Positioning and Ergonomics

    With the monitor mounted, adjust its height and angle for comfortable viewing. The top of the screen should sit at or slightly below eye level, and the display should be an arm’s length away. Tilt the monitor back 10 to 20 degrees to reduce glare and neck strain. Proper positioning reduces eye fatigue, especially when combined with better desk lighting.

    Reconnect your cables and secure them with the arm’s cable clips or a separate tie. If you opted for a single monitor arm (affiliate link) or decided you need more screens after reading our single vs dual monitor arm comparison, the setup process is essentially the same. Test the full range of motion to ensure nothing catches or scrapes, and you’re done.

  • Single vs Dual Monitor Arm: Which One Do You Actually Need?

    Single vs Dual Monitor Arm: Which One Do You Actually Need?

    This post contains affiliate links. If you buy through these links, we may earn a commission at no extra cost to you.

    If you’re setting up two monitors, one of the first decisions is whether to buy a dual-monitor arm on a shared base or two separate single arms. They look similar in photos but behave very differently on your desk.

    Dual monitor arm holding two screens

    How a dual arm works

    A dual monitor arm mounts both screens to a single vertical pole, usually with a crossbar or two arms branching off one base. This means one clamp point on your desk instead of two, which is useful if desk space or clamp room is tight. The tradeoff is that adjusting the height of the whole rig can shift both monitors at once, and the base itself takes up a fixed amount of depth right where it clamps on.

    How two single arms work

    Two independent single arms each get their own clamp and their own full range of motion. You can angle one monitor toward you for focused work and swing the other one flat or away when you’re not using it — something a shared dual arm usually can’t do as cleanly. The cost is two clamp points on your desk edge, which can be a problem on narrower desks or desks where the mounting area is limited.

    When a dual arm makes more sense

    If your monitors are the same size and you mostly want them sitting side by side at a fixed angle — a common setup for spreadsheet work, coding, or general multitasking — a dual arm is usually simpler to install and tidier looking, since there’s only one pole and one set of cables to manage.

    Dual monitor arm decluttering desktop

    When two single arms make more sense

    If your monitors are different sizes, if you frequently rotate one into portrait mode, or if you like to angle one screen toward a webcam or a second person, independent arms give you the flexibility to do that without fighting the mechanism. Streamers, video editors, and anyone who reconfigures their desk often tend to prefer this setup.

    Desk space is the deciding factor for most people

    On a desk under about 45 inches wide, two separate clamp points can start to feel cramped, especially if you also have a keyboard tray or other clamp-mounted accessories competing for edge space. In that situation, a dual arm’s single mounting point is the more practical choice even if you’d otherwise prefer the flexibility of two arms.

    Example picks: a dual monitor arm on a shared base if your screens mostly stay side by side, or a single monitor arm (buy two) if you want each screen to move independently. (affiliate link)

    Dual monitor arm swivel and tilt range

    Bottom line

    Neither option is objectively better — it comes down to how much you move your screens day to day and how much clear desk edge you actually have. If you’re not sure, picture your daily use: do you constantly re-angle one monitor, or do they basically stay put once set? That answer usually makes the decision for you.

  • How to Choose the Right Monitor Arm for Your Desk (Buying Guide)

    How to Choose the Right Monitor Arm for Your Desk (Buying Guide)

    This post contains affiliate links. If you buy through these links, we may earn a commission at no extra cost to you.

    A monitor arm looks like a simple accessory until you actually try to buy one. Between VESA standards, weight ratings, clamp types, and arm mechanisms, it’s easy to end up with something that either can’t hold your screen or won’t fit your desk at all. Here’s what actually matters before you buy.

    Single monitor arm mounted on a desk edge

    Measure your desk edge first

    Most monitor arms mount with a clamp that grips the back edge of your desk, and clamps have a maximum thickness they can grip — usually somewhere between 1.5 and 3.5 inches. Glass desks, very thick executive desks, and desks with a lip or trim can all cause fit problems. If your desk has an open back edge with no bracing underneath, a clamp mount will work fine. If it doesn’t, you’ll need a grommet mount instead, which goes through a drilled hole in the desktop.

    Check VESA compatibility

    Almost every monitor sold in the last decade has a VESA mounting pattern on the back — usually 75x75mm or 100x100mm for standard monitors, with wider patterns for ultrawide and larger screens. Check your monitor’s spec sheet for its VESA size before buying an arm, since not every arm supports both patterns out of the box.

    Match the weight rating to your actual monitor

    Every arm lists a weight range it can support, and gas-spring arms in particular need the monitor weight to fall within that range to move smoothly. Too light and the arm may drift upward on its own; too heavy and it will sag or refuse to hold position. If you plan to upgrade to a bigger monitor later, it’s worth buying an arm rated for more weight than you currently need.

    Monitor arm VESA mount close-up

    Gas spring vs friction arm

    Gas spring arms let you adjust height and angle with one hand and very little resistance, which is nice if you switch between sitting and standing often. Friction arms rely on tightened joints instead of a gas cylinder — they’re usually cheaper and hold position well once set, but adjusting them takes a bit more effort each time. If you rarely reposition your monitor once it’s set up, a friction arm is often the better value.

    Think about range of motion, not just height

    A good arm should let you pull the monitor closer or push it back, tilt it up or down, swivel it side to side, and rotate it into portrait mode if you want. Cheaper arms sometimes skip depth adjustment (extending forward and back), which matters more than people expect once the monitor is actually mounted — you’ll often want it slightly closer than you’d guess.

    Single vs dual clamp base

    If you’re running two monitors, decide early whether you want one dual arm on a shared base or two separate single arms. A shared base saves desk space but means both monitors move somewhat together; two independent arms give each screen full freedom of movement at the cost of an extra clamp point on your desk.

    Example pick: if you want a specific gas-spring arm to start with, the LDL-MOUNT Flex Fit single monitor arm covers the 17″-32″ range most people need. (affiliate link)

    Dual monitor arm for comparison

    Bottom line

    Before you add anything to your cart, confirm three things: your desk’s edge thickness and clearance underneath, your monitor’s VESA pattern, and your monitor’s weight versus the arm’s rated range. Get those three right and almost any reasonably built arm will serve you well for years.