Category: Storage & Organization

  • Pegboard vs Wall-Mounted Shelves vs Magnetic Strips: Desk Wall Storage Compared

    Pegboard vs Wall-Mounted Shelves vs Magnetic Strips: Desk Wall Storage Compared

    When your desk surface is maxed out and drawer space isn’t cutting it, the wall above your desk becomes prime real estate. Three popular wall-mounted storage approaches—pegboard systems, floating shelves, and magnetic strips—each solve different problems for home office workers. Here’s how to decide which setup makes the most sense for your workspace.

    Pegboard Storage Systems

    Pegboard setups offer the most flexibility for changing layouts. You can reposition hooks, bins, and accessories without creating new holes in your wall, which matters if you’re renting or still experimenting with your desk arrangement.

    • Best for: Frequently accessed small tools, office supplies, headphones, and items you swap in and out regularly
    • Installation footprint: Requires mounting the full board once; accessories then clip in and out without additional wall damage
    • Weight capacity: Individual pegs typically hold 5–10 pounds depending on material; metal pegboard handles heavier loads than particleboard versions
    • Visual impact: Can look busy if overloaded; works best when you embrace the visible-storage aesthetic rather than fight it
    • Typical depth: Extends 3–6 inches from wall once accessories are added

    Based on published specs and customer feedback, pegboard works well for people who need quick access to varied tools—think designers switching between tablets, styluses, and adapters, or anyone who wants their desk surface completely clear.

    Wall-Mounted Floating Shelves

    Shelves give you horizontal surface area for items that don’t hang well or need to sit flat. They integrate more traditionally into home décor than pegboard.

    • Best for: Books, plant pots, desktop organizers, framed photos, backup monitors or tablets you use occasionally
    • Installation footprint: Each shelf requires separate mounting; repositioning means new holes
    • Weight capacity: Varies widely—lightweight decorative shelves hold 10–15 pounds, while heavy-duty brackets can support 50+ pounds when anchored to studs
    • Visual impact: Cleaner, more traditional look; easier to style in a way that doesn’t scream “office”
    • Typical depth: 6–12 inches; deeper shelves hold more but can make a small room feel cramped

    Shelves make the most sense when your storage needs are stable and you value a polished appearance. They’re also the go-to if you’re storing heavier reference materials or want to double the shelf as display space.

    Magnetic Wall Strips

    Magnetic strips work for metal office supplies and lightweight tools. They’re the most minimal option visually but also the most limited in scope.

    • Best for: Scissors, metal rulers, keys, small knives (for unboxing), magnetic cable organizers, paper clips in small tins
    • Installation footprint: Adhesive-backed strips install without screws; screw-mount versions offer stronger hold
    • Weight capacity: Most strips hold 2–5 pounds total; individual items should weigh ounces, not pounds
    • Visual impact: Nearly invisible when empty; items appear to float against the wall
    • Typical depth: Under 1 inch including mounted items

    Magnetic strips excel in compact spaces where every inch of desk depth matters. They won’t solve big storage problems, but they’re excellent for keeping a few essential tools within arm’s reach without visual clutter.

    Combination Approaches

    Many effective setups use two or even all three systems. A common arrangement: one floating shelf for a backup monitor or reference books, pegboard below for daily tools, and a magnetic strip near the top corner for scissors and spare charging cables.

    • Layer by access frequency: Put daily-use items on pegboard or magnetic strips; less-frequent items on shelves
    • Match storage to item weight: Heavy items belong on shelves anchored to studs; lightweight tools can go anywhere
    • Consider your cable situation: If you’re managing wall-mounted chargers or power bricks, pegboard hooks or a dedicated shelf keep cords contained better than magnetic strips

    If you’re already managing cable organization under your desk, extending that system vertically with matching wall storage creates a cohesive look and keeps power accessible for wall-mounted devices.

    The Practical Choice

    Start with your actual inventory. List what you need off your desk surface, weigh or estimate each item, and note how often you grab it during a typical workday. Pegboard wins for variety and flexibility. Shelves win for capacity and conventional aesthetics. Magnetic strips win for minimalism and tight spaces. Most people benefit from combining at least two of the three.

  • Desktop Power Strip Placement: Where to Mount It for Easy Access and Safety

    Desktop Power Strip Placement: Where to Mount It for Easy Access and Safety

    Your desktop power strip is one of the most important—and most overlooked—components of your desk setup. Place it wrong, and you’ll end up tangling cords, blocking outlets, or creating a safety hazard. Place it right, and you’ll have easy access to power without clutter or risk.

    This checklist walks you through every decision point for power strip placement, from desk type to cord management to fire safety. Use it whether you’re setting up a new workspace or troubleshooting an existing one.

    Where to Place Your Desktop Power Strip: Decision Checklist

    • Mount it to the underside of your desk if you have a solid desktop. This keeps the strip off the floor, prevents accidental unplugging, and makes outlets easy to reach without bending over. Use heavy-duty adhesive strips or screws depending on your desk material.
    • Choose the side of your desk with the shortest cable runs. If your monitor, laptop charger, and lamp are all on the right side, mount the strip on the right. Shorter cables mean less clutter and fewer opportunities for tangles.
    • Position it near the back edge, not the front. This keeps plugs and cables out of your primary work zone and prevents you from accidentally knocking cords loose when you lean forward or adjust your chair.
    • Keep it at least six inches from any ventilation or heat source. Power strips generate heat when loaded, and placing them near your computer’s exhaust fan or a space heater creates unnecessary fire risk.
    • Ensure the power button (if your strip has one) is reachable without unplugging everything. You want to be able to shut off power at the end of the day or during a storm without crawling under your desk.
    • If you use a standing desk, mount the strip on the frame—not the desktop. As the desk raises and lowers, a strip mounted to the moving surface can create tension on the main power cable. Mounting to the stationary frame prevents this.
    • Avoid mounting directly over carpet or fabric surfaces. Heat dissipation is critical. If your desk has an open bottom and sits on carpet, mount the strip so air can circulate around it, or use a mount that elevates it slightly.
    • Route the main power cable cleanly to the wall outlet. Use cable clips or an under-desk cable tray to keep the thick main cord from dangling. This also reduces trip hazards and visual clutter.
    • Leave at least one outlet open for future additions. You’ll eventually add a new gadget, and having a spare outlet prevents the frustration of unplugging and replugging devices.
    • If your desk has limited clearance underneath, use a slim-profile or vertical power strip. Standard horizontal strips can bump into crossbars or drawer slides. Vertical models or low-profile designs fit tighter spaces more easily.
    • For multi-desk setups or L-shaped desks, use two smaller strips instead of one long one. This reduces cable runs, gives you better control over which devices are powered from which zone, and simplifies troubleshooting.
    • Check the amp/watt rating before plugging in high-draw devices. If you’re powering a gaming PC, dual monitors, and a space heater from one strip, you risk tripping the breaker or overheating the strip. Spread high-draw devices across multiple outlets or circuits.
    • Secure all connected cables with cable management accessories to prevent strain on the outlets. Dangling cables can pull plugs loose over time or create tension that damages the strip’s internal connections.
    • If you have pets or small children, mount the strip out of reach and use outlet covers. Curious hands or paws can unplug critical devices or create shock hazards.
    • Replace your power strip every 3-5 years, or immediately if you see scorch marks, loose outlets, or a burning smell. Power strips wear out, and old ones are fire risks. Mark the install date on the strip with a permanent marker so you know when to swap it.

    One Final Check

    After mounting, plug everything in and test each outlet. Wiggle the plugs gently—if any feel loose, reposition the strip or replace it. A secure, well-placed power strip is the foundation of a safe, clutter-free desk setup.

  • Under-Desk Storage Solutions Checklist: What to Install and Where

    Under-Desk Storage Solutions Checklist: What to Install and Where

    Heads up: some links in this post are affiliate links, which means we may earn a small commission if you make a purchase — at no extra cost to you.

    The space under your desk is prime real estate that most people completely ignore. If you’re struggling with desktop clutter or running out of places to put things, looking down instead of up can solve a lot of problems. Under-desk storage isn’t just about adding random shelves—it’s about strategically placing the right solutions in the right zones to keep your workspace functional and your floor clear.

    This checklist walks you through the main under-desk storage options, where to install them, and what belongs in each spot. Whether you’re working with a small apartment desk or a full home office, these principles apply.

    Under-Desk Storage Checklist

    • Cable tray or basket (rear edge, center): Mount a cable management tray along the back edge of your desk to corral power strips, excess cable length, and charging bricks. This keeps cords off the floor and prevents tangling. J-channel trays work well for minimal setups; wire baskets handle bulkier power supplies.
    • Hidden drawer (center, within arm’s reach): An under-desk drawer mounted to the underside of your desktop gives you a discreet spot for items you want nearby but out of sight—wallets, keys, headphones, personal items, or snacks. Look for models with adhesive or screw mounts depending on your desk material.
    • Keyboard tray (center front): If your desk is too high or you need to reclaim surface space, a slide-out keyboard tray goes front and center. Make sure it doesn’t interfere with leg clearance or your chair’s armrests. This is especially useful if you’re trying to fit a larger monitor or other equipment on your desktop.
    • CPU holder or tower mount (left or right side): If you use a desktop PC tower, mounting it off the floor with a dedicated CPU holder improves airflow, reduces dust intake, and frees up legroom. Position it on whichever side has easier cable access to your monitor and peripherals.
    • Hooks or hanging organizers (side edges): Adhesive or screw-in hooks on the left or right underside edge are perfect for hanging headphones, charging cables, or small bags. Keep these outside your leg zone to avoid knocking into them when you sit down or adjust your chair.
    • Shelf or secondary surface (rear, above feet): Some desks allow for a shallow shelf mounted underneath, toward the back. This works for storing notebooks, a document tray, or a small bin of office supplies. Avoid placing anything too heavy without checking your desk’s weight tolerance.
    • Pegboard or modular panel (rear or side): For maximum flexibility, mount a small pegboard panel under your desk to hold bins, hooks, or clips. This is ideal if your storage needs change frequently or you want easy access to tools, chargers, or craft supplies.
    • File box or rolling cart (under desk, mobile): If you don’t want to drill or stick anything to your desk, a slim rolling file box or cart that fits under your desk provides movable storage. Roll it out when you need access, tuck it back when you don’t. Great for paperwork, backup supplies, or equipment you use occasionally.

    Placement Tips

    Always map out your leg space first. Measure knee clearance and chair swivel radius before installing anything permanent. Avoid putting storage directly in front of where your legs go—center your setup around the user, not the equipment.

    Keep frequently used items within easy arm’s reach. Cables and power management should live at the rear edge where they’re accessible but not in the way. If you’re mounting multiple items, stagger them so they don’t compete for the same mounting surface or interfere with each other.

    For smaller desks, prioritize vertical and hidden storage over bulky bins. A slim cable tray and a hidden drawer can eliminate desktop clutter without sacrificing legroom.

    What Not to Store Under Your Desk

    Skip storing anything that generates heat (space heaters, large electronics) directly against your desk’s underside. Avoid stacking loose items that can fall or shift when you move your chair. And don’t use under-desk space as a catch-all for things you don’t know where else to put—be intentional about what goes where, or you’ll just move the clutter from your desktop to your feet.

  • What to Do With Old Desk Accessories When You Upgrade (Recycling, Donation & Reuse)

    What to Do With Old Desk Accessories When You Upgrade (Recycling, Donation & Reuse)

    When you upgrade your home office setup, you’re often left with a pile of perfectly functional but now-replaced desk accessories. That old monitor stand, the cable organizers that don’t fit your new layout, the drawer inserts that are the wrong size—they all deserve better than sitting in a closet or heading straight to a landfill.

    This checklist walks you through practical options for handling each type of desk accessory you’re replacing, whether it’s reusable, donatable, or recyclable. Making intentional decisions about old gear reduces waste and can help others build their own workspaces on a budget.

    Before You Dispose: Quick Assessment Checklist

    • Is it still functional? Test cables, clean surfaces, and confirm moving parts still work before deciding its fate.
    • Does it fit current standards? USB-A hubs and non-adjustable accessories may have limited secondhand value, but someone upgrading from nothing will still use them.
    • Is it worth storing? If you might downsize your desk or move to a smaller space, compact organizers and trays or drawer inserts are worth keeping in reserve.
    • Can it be repurposed? Cable clips work in kitchens, monitor risers become kitchen shelves, and desk lamps fit bedside tables.

    What to Donate (and Where)

    • Functional desk lamps: Local Goodwill, Salvation Army, or Buy Nothing groups readily accept working lamps, especially adjustable models.
    • Monitor stands and risers: Community colleges, libraries, and nonprofit offices often need basic ergonomic accessories.
    • Cable management accessories: Velcro ties, clips, and sleeves are useful to anyone setting up a workspace; include them in donation boxes even if they seem minor.
    • Drawer organizers and trays: These work beyond desks—donated organizers often go to craft rooms, garages, or student housing.
    • USB hubs (working): Older USB-A hubs still serve budget setups; test functionality before donating to avoid passing on e-waste.

    What to Recycle Properly

    • Broken cables and adapters: Best Buy and Staples both accept small electronics and cables for recycling at no charge.
    • Non-functional lamps: Remove bulbs (recycle separately if LED or CFL) and check for local e-waste recycling events or drop-off centers.
    • Plastic cable raceways and trays: If cracked or damaged, check your municipal recycling guidelines—some accept hard plastics with a #5 or #7 symbol.
    • Metal accessories: Monitor arm parts, metal organizers, and brackets can go to scrap metal recycling if your local facility accepts them.

    Smart Reuse Ideas

    • Cable clips in other rooms: Kitchen counters, nightstands, and entertainment centers all benefit from the same cable management principles you use at your desk.
    • Desk mats as workbench protection: Old felt or leather mats protect garage workbenches, hobby tables, or kitchen counters during projects.
    • Monitor risers as pantry shelves: Sturdy risers create extra vertical storage in cabinets and closets.
    • Drawer organizers for tools or craft supplies: The same compartments that held pens work equally well for screws, beads, or sewing notions.
    • USB fans for travel or bedside use: Compact desk fans are portable and work anywhere with a USB port.

    When to Offer Items Locally

    • Facebook Marketplace and Craigslist: List bundles of accessories together (“desk setup lot”) for people furnishing their first home office.
    • Buy Nothing groups: Hyper-local groups often have members looking for exactly the niche items you’re replacing.
    • Nextdoor: Neighbors moving into new homes or setting up remote work spaces appreciate free, functional gear.
    • College bulletin boards: Students upgrading dorm rooms or first apartments will use almost any desk accessory in good condition.

    The goal is to keep functional items in circulation and dispose of broken ones responsibly. A little effort sorting your old accessories means less waste, potential tax deductions from donations, and the satisfaction of knowing your replaced gear is still useful somewhere.

  • Desk Accessories That Actually Reduce Clutter (Instead of Adding to It)

    Desk Accessories That Actually Reduce Clutter (Instead of Adding to It)

    Heads up: some links in this post are affiliate links, which means we may earn a small commission if you make a purchase — at no extra cost to you.

    Most desk accessories promise organization, but many just become more objects to manage. The difference between helpful storage and additional clutter comes down to choosing items that consolidate, hide, or eliminate other pieces rather than simply occupying more real estate. Here’s a checklist of desk accessories that genuinely reduce visual and physical clutter based on their design and function.

    The Core Checklist: Clutter-Reducing Desk Accessories

    • Monitor arms that free up desk footprint. Removing the monitor base creates usable surface area underneath and behind your screen. Based on buyer reviews, this single change often opens up 30-50% more workspace on smaller desks. If you’re working with limited square footage, Small Desk, Big Clutter: Organization Ideas for Compact Spaces covers additional layout strategies.
    • Under-desk cable trays that hide power strips and adapters. These mount beneath your desktop and keep surge protectors, transformer bricks, and cable coils completely out of sight. According to published specs and customer feedback, J-channel and basket styles hold the most without sagging. An under-desk cable tray (affiliate link) mounts with screws or adhesive and typically measures 15–17 inches long, enough for a standard six-outlet power strip and several adapters.
    • Drawer organizers with fixed compartments. Unlike loose trays that shift around, organizers with built-in dividers keep pens, sticky notes, and charging cables separated without requiring rearrangement. Based on user reviews, sets with at least five compartments handle typical desk supplies without overflow.
    • Cable sleeves that bundle multiple cords into one visual line. Instead of three to five separate cables running from desk to outlet, a neoprene or fabric sleeve consolidates them into a single tube. This doesn’t eliminate cords, but it cuts the visual count dramatically and makes vacuuming easier.
    • Wireless charging stands that replace a tangle of phone cables. A stand keeps your phone upright and visible while charging, removing the need for a loose Lightning or USB-C cable on your desktop. Buyers report that angled stands work better than flat pads because they keep the phone in view during video calls. For more on wireless charging options, see Wireless Charging Pads for Your Desk: Worth It or Not?
    • Desk risers with built-in storage underneath. These elevate your monitor to proper eye level while creating a shelf for notebooks, external drives, or a keyboard when not in use. Based on specs, models with 4–5 inches of clearance fit standard wireless keyboards and slim accessories.
    • Vertical file holders that use wall or monitor-mount space. Moving paperwork off the desk surface and onto a wall-mounted organizer or monitor-side caddy reduces horizontal clutter. Buyers note that metal mesh versions hold more weight and don’t sag over time compared to plastic alternatives.
    • Single-item charging hubs that replace multiple wall adapters. A USB-C hub or multi-port charging station consolidates phone, tablet, and smartwatch chargers into one device, freeing up outlet space and reducing cable sprawl across your desk.

    What Doesn’t Make the Cut

    Decorative trays, novelty pen holders, and desk organizers with too many small bins often add visual noise without meaningfully consolidating items. If an accessory doesn’t actively reduce the number of visible objects or free up usable surface area, it’s more likely contributing to clutter than solving it.

    The Bottom Line

    Effective desk accessories remove or hide more than they occupy. Prioritize items that consolidate multiple objects, use vertical or under-desk space, or eliminate cables entirely. Each addition should leave your desk visibly clearer than before.

  • Desktop File Organization Checklist: What to Keep on Your Desk vs What to Store Away

    Desktop File Organization Checklist: What to Keep on Your Desk vs What to Store Away

    This article includes affiliate links. We may earn a commission on qualifying purchases, at no additional cost to you.

    Physical paper files still show up in most home offices—tax documents, client contracts, project notes, and ongoing work. The difference between a functional desk and a cluttered one often comes down to knowing what should stay within arm’s reach and what belongs elsewhere. This checklist helps you sort active files from archive material so your desk stays clear without sacrificing quick access to what you actually need.

    Items to Keep on Your Desk Surface

    Your desk surface should only hold what you’re actively using this week or need multiple times per day. Here’s what qualifies:

    • Current project folders – Anything you reference daily or will finish within the next 7–10 days belongs in a desktop file holder or vertical organizer.
    • Today’s action items – Bills to pay this week, forms to complete, or documents awaiting signatures stay visible until handled.
    • Quick-reference sheets – Phone lists, process checklists, or frequently-used templates you consult several times daily.
    • Blank notepads and sticky notes – Active writing supplies belong on the surface; backup stock goes in a drawer.

    If you find yourself digging through a stack to reach what you need, that’s a sign too much is sitting out. Vertical trays or tiered risers can compress surface clutter while keeping items visible.

    Items for Drawer Storage

    Drawers work best for things you need this month but not necessarily today. Store these within your desk rather than on top:

    • Reference documents – Manuals, onboarding guides, or procedure documents you check once or twice per week.
    • Ongoing but non-urgent projects – Files for tasks scheduled two weeks out or in planning stages.
    • Office supplies inventory – Extra pens, staplers, tape, and other backup items.
    • Personal paperwork – Insurance cards, membership info, or non-urgent correspondence.

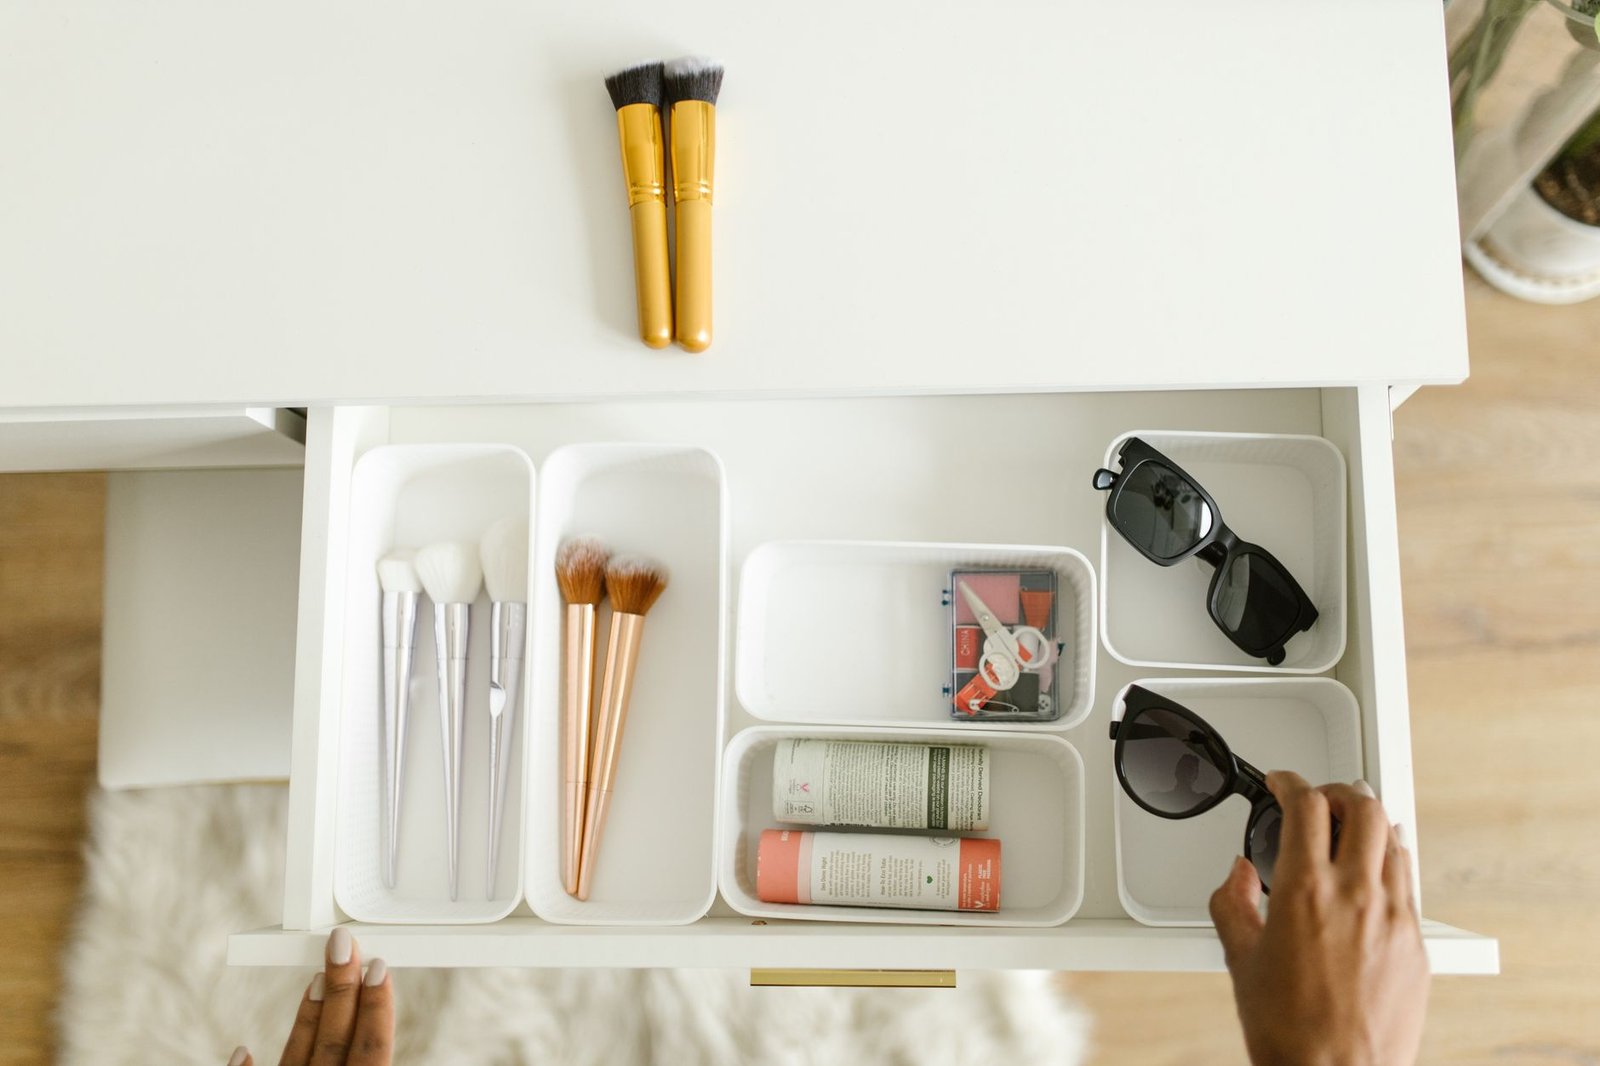
    A 7-piece drawer organizer set (affiliate link) keeps these categories separated so you’re not hunting through a jumbled drawer every time you need something.

    Items for Off-Desk Archive Storage

    Anything you haven’t touched in 30+ days or won’t need until tax season belongs off your desk entirely:

    • Completed project files – Finished work that’s closed out but needs retention for records.
    • Annual documents – Tax records, annual reviews, or contracts reviewed once per year.
    • Historical reference material – Old proposals, past client files, or archived correspondence.
    • Sentimental or “just in case” papers – Awards, certificates, or documents you might need someday but rarely access.

    Use a filing cabinet, storage box, or shelf unit in a closet or corner. Label everything clearly with dates and categories so retrieval stays simple when needed.

    The Weekly Sort Rule

    Set a Friday end-of-week habit: spend five minutes sorting your desktop files. Completed items move to archive, upcoming projects stay on the desk, and anything in limbo goes into a drawer. This prevents the gradual pile-up that turns a clean desk into a paper avalanche.

    If you’re also managing cables alongside paper, consider how under-desk cable solutions can free up even more surface area. Physical and digital clutter often feed off each other—tackle both for the cleanest result.

    How Much Storage You Actually Need

    The right amount depends on your work type. Freelancers juggling multiple clients typically need more active surface storage than employees with one primary project. Consultants and creatives often maintain larger reference libraries than data-entry or customer-service roles.

    For a detailed breakdown by job category, see our guide on how much desk storage different work types require. Match your setup to your actual workflow, not an idealized minimal aesthetic that doesn’t support how you work.

  • Drawer Organizer Checklist: What to Store Where for a Clean Desk

    Drawer Organizer Checklist: What to Store Where for a Clean Desk

    This article includes affiliate links. We may earn a commission on qualifying purchases, at no additional cost to you.

    A desk drawer can either be a strategic storage system or a chaotic junk pile. The difference comes down to intentional placement—knowing what belongs in which drawer and how to keep categories separate. This checklist walks through how to organize your desk drawers by function, so you can find what you need without digging.

    Most desks come with two to four drawers of varying depths. The goal is to match item type, frequency of use, and drawer size so everything has a dedicated spot. Based on published ergonomic guidelines and common home-office workflow patterns, here’s how to organize each drawer.

    Top Drawer: High-Frequency Essentials

    Your top drawer should hold items you reach for multiple times per day. This is prime real estate—shallow, close to your hands, and easiest to access without leaning or standing.

    • Writing tools: Keep three to five pens/pencils you actually use, not the dozen freebies from conferences.
    • Sticky notes and small notepads: Place near the front edge for quick grabs during calls.
    • Paper clips and binder clips: Use a small container or tray compartment to prevent scatter.
    • USB drives and SD cards: Store in a dedicated section; these are easy to lose in clutter.
    • Headphones or earbuds: If you use them daily, keep them in the top drawer rather than tangled on your desk.

    A 7-piece drawer organizer set (affiliate link) can divide this drawer into fixed zones, preventing the slow creep of miscellaneous items.

    Middle Drawer: Stationery and Supplies

    The middle drawer typically has more depth and should house less-frequent supplies that still support your daily work.

    • Extra notebooks and legal pads: Stack vertically if the drawer is deep enough.
    • Tape, stapler, and scissors: Keep these together in one section; they’re used occasionally but need to be findable fast.
    • Charging cables you swap regularly: Lightning, USB-C, or micro-USB cables you cycle through devices.
    • Stamps, envelopes, and return labels: Useful for home-office invoicing or returns.
    • Business cards: Store in a small box or cardholder to avoid bending.

    If you’re working with limited drawer space, check out minimalist desk setup ideas for tips on reducing what you keep on hand.

    Bottom Drawer: Archival and Overflow

    The deepest drawer is best for items you need monthly or less, plus bulkier supplies.

    • Manuals and warranties: Keep product documentation for your desk gear in a labeled folder.
    • Old notebooks or project files: Archive completed work you might reference later.
    • Extra power adapters and backup cables: Store coiled with velcro ties to prevent tangles.
    • Seasonal items: Desk fan in winter, portable heater manual in summer.
    • Office supplies in bulk: Extra pens, notepads, or sticky note packs you haven’t opened yet.

    File Drawer (If Available): Documents Only

    If your desk includes a file drawer with hanging rails, reserve it exclusively for paper files.

    • Active project folders: Keep current client work, contracts, or reference sheets within reach.
    • Tax documents and receipts: Use labeled folders by year or category.
    • Instruction sheets: Printouts for software workflows or device setup steps.
    • Printed invoices or statements: Anything you need in hard copy for record-keeping.

    For tips on clearing visible clutter before organizing drawers, see our guide on common cable management mistakes.

    What Doesn’t Belong in Desk Drawers

    Some items create mess or waste prime drawer space:

    • Food wrappers or snacks: These attract pests and create odors.
    • Dead batteries or broken electronics: Recycle or dispose of these properly.
    • Duplicate tools: You don’t need four staplers or ten highlighters.
    • Unread mail or random receipts: Process or file these, don’t just stash them.

    Organizing by drawer function keeps your workspace efficient and reduces the time spent hunting for basics. Define zones, stick to categories, and revisit the system every few months to prevent drift.

  • Small Desk, Big Clutter: Organization Ideas for Compact Spaces

    Small Desk, Big Clutter: Organization Ideas for Compact Spaces

    A small desk clutters faster than a large one simply because there’s less surface to absorb the mess — the same amount of stuff looks and feels far more chaotic on a 40-inch desk than a 60-inch one. Here’s how to actually fix that without buying a bigger desk.

    Small desk being organized to reduce clutter

    Go vertical before you go wider

    When desk surface is limited, the fastest way to reclaim space is to move things off the desktop entirely and onto the wall or a vertical riser. Pegboards, wall-mounted shelves, and monitor stands with built-in storage underneath all free up desk area without needing more floor space.

    Cut down to what you touch daily

    Small desks amplify the cost of keeping things “just in case” — an item you touch once a month is taking up space you need every day. Do a quick audit: anything not used in the past two weeks probably belongs in a drawer, on a shelf, or somewhere else entirely.

    Use the space under the desk, not just on it

    Under-desk drawer organizers, cable trays, and small clip-on bins use space that’s otherwise sitting empty. This is especially valuable on compact desks since it doesn’t compete with your limited desktop real estate at all.

    Drawer organizer reducing desk clutter

    Stack instead of spreading out

    A monitor riser with drawer space underneath, or stackable organizer trays, let you use vertical space on the desk itself rather than spreading items across the whole surface. This matters more on a small desk, where spreading items out eats into your working area almost immediately.

    Cable clutter counts as visual clutter

    On a small desk, loose cables are more visually dominant simply because there’s less other surface to distract from them. Cleaning up cable routing often makes a compact desk look noticeably less cluttered even if you haven’t removed a single item from the desktop.

    Cable tray keeping small desk tidy

    Bottom line

    On a small desk, moving things off the surface — up onto the wall, down under the desk, or into drawers — matters more than any single organizer product. Solve the space problem in three dimensions, not just across the desktop.

  • How Much Desk Storage Do You Really Need? (By Work Type)

    How Much Desk Storage Do You Really Need? (By Work Type)

    This post contains affiliate links. If you buy through these links, we may earn a commission at no extra cost to you.

    Desk storage needs vary a lot more by job type than most buying guides admit. Someone doing video calls all day has almost nothing to store; someone doing paperwork or physical craft work needs real drawer space. Here’s a more realistic way to think about it based on how you actually work.

    7-piece drawer organizer set

    Remote meetings and computer-only work

    If your job is almost entirely on-screen — calls, documents, spreadsheets — your storage needs are genuinely small: a place for a notebook, a charger, and maybe a water bottle. Over-buying storage in this case usually just creates empty drawers that become junk collectors. A single small tray or a slim drawer unit is usually enough.

    Hybrid work with occasional paper

    If you deal with printed documents, mail, or the occasional physical file, you need at least one drawer with hanging file capacity or a document tray, even if you’re mostly paperless day to day. The mistake here is assuming “mostly digital” means “no storage needed” — the occasional physical item still needs a home, or it ends up as a stack on the desk surface.

    Creative and craft work

    Design, writing with physical references, hobby work, or anything involving tools and materials needs the most storage of any category — multiple drawer levels or a cart, ideally sorted by project or material type rather than one catch-all drawer. Open trays tend to fail here because craft supplies multiply quickly and clutter the desktop instead of staying contained.

    Under-desk drawer organizer in use

    Gaming and multi-device setups

    If your desk supports several devices — a PC, a console, peripherals, controllers — the priority shifts from paper storage to cable and accessory storage. A drawer for controllers and cables plus a stand or hooks for headsets usually covers this better than traditional document-focused organizers.

    The general rule

    Storage should match what physically accumulates on your desk in a normal week, not what a generic “complete desk setup” checklist suggests. Track what actually piles up on your desk surface for a week before buying anything — that pile is a more accurate shopping list than any general guide, including this one.

    Example pick: the same 7-piece drawer organizer set works well for most of the hybrid-work and creative-work categories above. (affiliate link)

    Organizer sorted by item type

    Bottom line

    Under-buying storage means clutter; over-buying means empty drawers and wasted desk footprint. Matching storage to your actual work type, rather than a one-size-fits-all setup, is what keeps a desk both functional and uncluttered long term.

  • Desk Organizer Types Explained: Trays, Drawers, and Risers

    Desk Organizer Types Explained: Trays, Drawers, and Risers

    This post contains affiliate links. If you buy through these links, we may earn a commission at no extra cost to you.

    “Desk organizer” covers a wide range of products that solve very different problems, and buying the wrong type is a common reason organizers end up unused in a drawer themselves. Here’s how the main categories differ and which one actually fits your situation.

    Hidden under-desk drawer organizer

    Trays: for things you touch constantly

    A desk tray — usually a shallow, open compartment or a set of them — is meant for items you reach for multiple times a day: pens, sticky notes, a phone, small tools. Because trays are open, they only work well if you’re willing to keep them tidy; anything open tends to become a catch-all if you’re not intentional about what goes in it. Trays are the right choice when speed of access matters more than tidiness.

    Drawer organizers: for things you want out of sight

    Under-desk or attached drawer units add closed storage without taking up desktop surface area, which makes them the better option for anything you don’t need to see or reach constantly — chargers, cables you’re not using, documents, spare stationery. The main tradeoff is a small delay: opening a drawer takes a second longer than reaching for an open tray, which matters if you’re organizing items you use often.

    Monitor risers: dual-purpose storage

    A monitor riser lifts your screen to a more comfortable eye level while creating a storage gap underneath — often enough room for a keyboard, notebook, or small tray. This makes risers useful less as “organizers” in the traditional sense and more as a way to reclaim desk space that would otherwise sit empty under a monitor that’s already at the right height.

    Drawer organizer with small items

    Pegboards and wall-mounted organizers

    If desktop space is the real constraint, moving storage off the desk entirely with a pegboard or wall-mounted organizer can free up more usable surface area than any desktop tray or drawer. This works best for items that don’t need to be touched multiple times per hour, since reaching to a wall panel takes slightly more effort than reaching across a desk.

    How to actually choose

    Sort what’s currently cluttering your desk into two piles: things you use several times a day, and things you use occasionally but still want nearby. The first pile belongs in a tray or an easily reachable spot; the second pile belongs in a drawer, riser storage gap, or wall organizer. Buying one organizer type and expecting it to handle both categories is usually why organizers stop getting used within a few weeks.

    Example picks: a 7-piece drawer organizer set for the drawer category above, or a no-drill under-desk hidden organizer if you want extra storage without giving up drawer space. (affiliate link)

    Drawer organizer with pens and tools

    Bottom line

    There’s no single best desk organizer — there’s only a best fit for how often you touch a given item. Match access frequency to storage type first, and the specific product you buy matters much less.