Author: empezz5@gmail.com

  • Can You Use a Monitor Arm With a Glass Desk? What You Need to Know

    Can You Use a Monitor Arm With a Glass Desk? What You Need to Know

    Heads up: some links in this post are affiliate links, which means we may earn a small commission if you make a purchase — at no extra cost to you.

    Glass desks look sleek and modern, but they come with a unique challenge when you want to add a monitor arm. The clamp-style mounts that work perfectly on wood or laminate desks can crack or shatter glass if you’re not careful. Before you write off monitor arms entirely, there are solutions—you just need to understand the risks and know what precautions to take.

    This FAQ covers the most common questions about using monitor arms with glass desks, including what types work best, how to protect your surface, and when you should skip the mount altogether.

    Can you safely mount a monitor arm on a glass desk?

    Yes, but only with the right precautions. Standard C-clamp monitor arms apply concentrated pressure to a small area, which can crack tempered glass. To distribute that force, you need to use protective pads or mounting plates between the clamp and the glass surface. Many manufacturers include rubber pads, but for glass desks, you’ll want something more substantial—thick neoprene pads, silicone bumpers, or metal reinforcement plates work better.

    Grommet-style mounts that drill through the desk are generally not recommended for glass unless the desk was specifically designed with pre-drilled mounting holes. Drilling tempered glass yourself will almost certainly shatter it.

    What’s the safest type of monitor arm for a glass desk?

    Freestanding monitor arms are the safest option because they don’t clamp onto the desk at all. These arms use a weighted base that sits on your desktop, eliminating any pressure points that could crack glass. The tradeoff is that freestanding models take up desk real estate and typically cost more than clamp-style arms.

    If you prefer a clamp mount, look for models with large, flat clamp surfaces rather than narrow edges. A single monitor arm (affiliate link) with wide rubber-coated clamps will distribute weight more evenly than compact designs. Dual arms carry more weight, so extra reinforcement becomes even more critical.

    How thick does a glass desk need to be for a monitor arm?

    Most monitor arm manufacturers specify a minimum desk thickness between 0.4 and 3 inches. For glass desks specifically, thicker is always safer—ideally at least half an inch (12-15mm) of tempered glass. Thinner glass lacks the structural strength to handle the clamping force and weight of a monitor arm, even with protective pads.

    Check your desk specifications before buying any mount. If your glass desk is less than 10mm thick or isn’t tempered glass, a freestanding arm is your only safe bet.

    What else should you consider before mounting on glass?

    Monitor weight matters. A 27-inch monitor can weigh 15-20 pounds, and when mounted on an articulating arm, that weight creates leverage that magnifies stress on the clamp point. If you’re running a dual-monitor setup, the combined load increases the risk significantly.

    Desk edge access is another factor. Some glass desks have metal or wood framing around the edges, which provides a much safer clamping surface than bare glass. If your desk has this type of reinforced edge, position the clamp there instead of on the glass itself.

    Also think about cable management under your desk—glass surfaces make it harder to hide cables, so you may need creative routing solutions to keep cords out of sight.

    When should you skip the monitor arm entirely?

    If your glass desk is thin, frameless, or you’re unsure whether it’s tempered, don’t risk it. A cracked desk is far more expensive than a monitor stand. Instead, use a traditional monitor stand or a monitor riser to achieve better ergonomic height without the mounting risk.

    Budget setups in small home offices may not justify the cost of a freestanding arm when a simple riser does the job. Save the monitor arm investment for a more mount-friendly desk surface.

  • Desktop File Organization Checklist: What to Keep on Your Desk vs What to Store Away

    Desktop File Organization Checklist: What to Keep on Your Desk vs What to Store Away

    This article includes affiliate links. We may earn a commission on qualifying purchases, at no additional cost to you.

    Physical paper files still show up in most home offices—tax documents, client contracts, project notes, and ongoing work. The difference between a functional desk and a cluttered one often comes down to knowing what should stay within arm’s reach and what belongs elsewhere. This checklist helps you sort active files from archive material so your desk stays clear without sacrificing quick access to what you actually need.

    Items to Keep on Your Desk Surface

    Your desk surface should only hold what you’re actively using this week or need multiple times per day. Here’s what qualifies:

    • Current project folders – Anything you reference daily or will finish within the next 7–10 days belongs in a desktop file holder or vertical organizer.
    • Today’s action items – Bills to pay this week, forms to complete, or documents awaiting signatures stay visible until handled.
    • Quick-reference sheets – Phone lists, process checklists, or frequently-used templates you consult several times daily.
    • Blank notepads and sticky notes – Active writing supplies belong on the surface; backup stock goes in a drawer.

    If you find yourself digging through a stack to reach what you need, that’s a sign too much is sitting out. Vertical trays or tiered risers can compress surface clutter while keeping items visible.

    Items for Drawer Storage

    Drawers work best for things you need this month but not necessarily today. Store these within your desk rather than on top:

    • Reference documents – Manuals, onboarding guides, or procedure documents you check once or twice per week.
    • Ongoing but non-urgent projects – Files for tasks scheduled two weeks out or in planning stages.
    • Office supplies inventory – Extra pens, staplers, tape, and other backup items.
    • Personal paperwork – Insurance cards, membership info, or non-urgent correspondence.

    A 7-piece drawer organizer set (affiliate link) keeps these categories separated so you’re not hunting through a jumbled drawer every time you need something.

    Items for Off-Desk Archive Storage

    Anything you haven’t touched in 30+ days or won’t need until tax season belongs off your desk entirely:

    • Completed project files – Finished work that’s closed out but needs retention for records.
    • Annual documents – Tax records, annual reviews, or contracts reviewed once per year.
    • Historical reference material – Old proposals, past client files, or archived correspondence.
    • Sentimental or “just in case” papers – Awards, certificates, or documents you might need someday but rarely access.

    Use a filing cabinet, storage box, or shelf unit in a closet or corner. Label everything clearly with dates and categories so retrieval stays simple when needed.

    The Weekly Sort Rule

    Set a Friday end-of-week habit: spend five minutes sorting your desktop files. Completed items move to archive, upcoming projects stay on the desk, and anything in limbo goes into a drawer. This prevents the gradual pile-up that turns a clean desk into a paper avalanche.

    If you’re also managing cables alongside paper, consider how under-desk cable solutions can free up even more surface area. Physical and digital clutter often feed off each other—tackle both for the cleanest result.

    How Much Storage You Actually Need

    The right amount depends on your work type. Freelancers juggling multiple clients typically need more active surface storage than employees with one primary project. Consultants and creatives often maintain larger reference libraries than data-entry or customer-service roles.

    For a detailed breakdown by job category, see our guide on how much desk storage different work types require. Match your setup to your actual workflow, not an idealized minimal aesthetic that doesn’t support how you work.

  • Cable Management Box vs Cable Sleeve: Which Hides Your Desk Cords Better?

    Cable Management Box vs Cable Sleeve: Which Hides Your Desk Cords Better?

    When you’re tackling desk cable clutter, two solutions often come up: cable management boxes and cable sleeves. Both promise to hide messy cords, but they work in completely different ways and suit different desk scenarios. If you’re choosing between the two—or wondering whether you need both—this comparison breaks down what each does best.

    Cable management boxes are enclosed containers that sit on or under your desk, designed to hide power strips, adapters, and the tangled mess where multiple cords converge. Cable sleeves, on the other hand, are flexible fabric or neoprene tubes that bundle loose cables together into a single, cleaner-looking run. The box contains; the sleeve consolidates.

    Quick Comparison: Box vs Sleeve

    Feature Cable Management Box Cable Sleeve
    Best for Hiding power strips, adapters, and cable intersections Bundling cables along a route (desk leg to floor, monitor to PC)
    Location Stationary—sits on desk surface or floor Runs along cable path, flexible placement
    Appearance Enclosed box (wood, plastic, or fabric) Tube-like wrap (neoprene, fabric, braided)
    Access to cables Lift lid or open end flap Split seam or open-ended tube—easy to add/remove cables
    Typical capacity Holds 6–12+ cables plus full power strip Bundles 3–8 cables depending on diameter
    Ventilation Side slots or perforations to prevent heat buildup Open-ended; no heat concern
    Price range $12–$35 $8–$20 (per 5–6 ft sleeve)

    When to Use a Cable Management Box

    Based on published specifications and customer feedback, cable management boxes excel when you have a central point of cable chaos—usually where your power strip lives. If your desk has a surge protector with six outlets, multiple wall adapters, and a nest of overlapping cords, a box keeps all of that contained and out of sight.

    Boxes work well on top of a desk for monitor and laptop chargers, or under the desk near a wall outlet. They’re static solutions, so pick a spot that won’t need frequent repositioning. Most designs include cutouts or slots on both ends to route cables in and out while keeping dust away from the electronics inside.

    One downside: boxes take up dedicated space. Measure before you buy to ensure it fits your desk footprint or floor clearance. If you’re aiming for a minimalist desk setup, a sleek wooden or fabric-covered box blends better than bright plastic models.

    When to Use a Cable Sleeve

    Cable sleeves shine when you need to tame the visible runs between devices. Think monitor cables dropping from your display to your PC tower, or charging cords traveling from your desk edge to a wall outlet. Sleeves group those individual strands into one bundled line, dramatically reducing visual noise.

    Because sleeves are flexible and usually feature a split seam or hook-and-loop closure, you can add or remove cables without unthreading the entire bundle. This makes them ideal for setups that change frequently—adding a second monitor, swapping USB peripherals, or adjusting desk lamp placement.

    Sleeves don’t hide bulky adapters or power bricks, though. If your charger has a chunky transformer, the sleeve will stop there, and you’ll still see the adapter itself. For a complete solution, many people pair a sleeve along the cable run with a box at the power source.

    Which One Should You Choose?

    If your biggest pain point is a tangled power strip and multiple wall warts, start with a cable management box. If your desk looks messy because of loose cords snaking everywhere, grab a cable sleeve first. For most home office setups, the answer is both: a box to hide the power hub and a sleeve to bundle the visible runs between your monitor, PC, and peripherals. Together, they cover the two main sources of cable clutter without requiring permanent installation or complex routing systems.

  • How to Position Your Desk Lamp to Avoid Screen Glare

    How to Position Your Desk Lamp to Avoid Screen Glare

    Heads up: some links in this post are affiliate links, which means we may earn a small commission if you make a purchase — at no extra cost to you.

    Screen glare from poor lamp placement is one of the most common complaints in home offices, yet it’s completely preventable with the right setup. A well-positioned desk lamp improves visibility without creating reflections on your monitor or causing eye fatigue. Understanding the angles and zones that cause glare will help you configure your lighting for maximum comfort and productivity.

    Why Desk Lamp Glare Happens

    Glare occurs when light from your lamp reflects directly off your monitor screen and into your eyes. This typically happens when the lamp sits directly behind or in front of you, creating a direct bounce path between the light source, screen, and your line of sight. Glossy or matte-finish monitors both suffer from this issue, though glossy screens tend to show more pronounced reflections. The problem compounds when your lamp is at or above eye level, increasing the angle of reflection into your field of vision.

    The Side-Placement Rule

    The most effective position for a desk lamp is to the side of your monitor—specifically, on your non-dominant hand side. If you’re right-handed, place the lamp on your left; this prevents your writing hand from casting shadows on your work. Position it 15 to 20 inches away from the edge of your monitor at roughly a 45-degree angle from your seating position. This side placement keeps the light source outside the reflection zone while still illuminating your desk surface and keyboard. Adjustable lamps work particularly well here because you can fine-tune the angle to avoid any stray reflections while maintaining adequate task lighting. A rechargeable LED desk lamp (affiliate link) with a flexible arm makes it easy to dial in the perfect angle for your specific monitor.

    Height and Angle Adjustments

    Your lamp’s vertical position matters just as much as its horizontal placement. Keep the light source below eye level—ideally 15 to 18 inches above your desk surface. This downward angle directs light onto your workspace without bouncing off the screen. Tilt the lamp head so it points slightly away from the monitor rather than toward it. If you notice any reflections, adjust the lamp head in small increments until the glare disappears. For those working with dual monitors, position the lamp farther to the side to minimize reflections across both screens, or consider adding a second lamp on the opposite side for balanced illumination without hotspots.

    Combining Ambient and Task Lighting

    Relying solely on a desk lamp often creates too much contrast between your bright workspace and the darker room around you, which can strain your eyes. Layer in ambient lighting—ceiling lights, floor lamps, or wall sconces—to reduce the overall brightness differential. Your desk lamp should be your brightest source, but the room shouldn’t be completely dark. This balanced approach minimizes pupil adjustment and reduces fatigue during long work sessions. If you’re still experiencing eye strain despite proper lamp placement, you may also want to review whether your color temperature matches your work needs.

    Quick Glare Check and Troubleshooting

    Once you’ve positioned your lamp, sit in your normal working position and look at your monitor. If you see a bright spot or reflection of the bulb or lamp shade, the light is still in the glare zone. Move the lamp farther to the side or adjust its tilt. Turn off overhead lights temporarily to isolate whether the desk lamp alone is causing the issue. Also check for indirect reflections—sometimes light bounces off walls, picture frames, or glossy desk surfaces before hitting your screen. Matte desk surfaces and non-reflective wall paint help reduce these secondary sources. If cable clutter is interfering with lamp placement, consider organizing your desk cords with sleeves, clips, or trays to free up positioning options.

  • Monitor Arm Compatibility FAQ: Will It Work With Your Desk and Monitor?

    Monitor Arm Compatibility FAQ: Will It Work With Your Desk and Monitor?

    Heads up: some links in this post are affiliate links, which means we may earn a small commission if you make a purchase — at no extra cost to you.

    Before you buy a monitor arm, you need to know whether it will actually work with your desk and monitor. Compatibility issues are the most common reason monitor arms get returned, and they’re almost always avoidable if you check a few key measurements first. This FAQ covers the most important compatibility questions so you can make a confident purchase.

    Will a monitor arm work with my desk thickness?

    Most monitor arms use a C-clamp that requires a desk thickness between 0.4 and 2.4 inches (roughly 10–60 mm). Measure the edge of your desk where you plan to mount the arm—not the entire desk surface if it has a hollow core or frame underneath. Glass desks, standing desks with thin tops, and some IKEA models fall outside this range and won’t work with standard clamps.

    If your desk is too thick, a grommet mount (which goes through a drilled hole) may be your only option. If it’s too thin or has a lip that interferes, look for arms that include extension brackets or support spacers. Based on published specifications and customer feedback, arms with adjustable clamp ranges offer the best flexibility for non-standard desks.

    How do I know if my monitor is compatible with VESA mounting?

    Check the back of your monitor for four screw holes arranged in a square pattern. The two most common VESA patterns are 75 × 75 mm and 100 × 100 mm. If you see these holes, your monitor is compatible with nearly every monitor arm on the market.

    Some ultrawide or gaming monitors use 200 × 200 mm patterns, which require heavier-duty arms. If there are no visible holes, consult your monitor’s manual or search “[monitor model] VESA compatible.” Apple Studio Displays, iMacs, and some all-in-one PCs do not support VESA without aftermarket adapters. Measure your monitor’s weight, too—most single arms support 4.4 to 19.8 lbs (2–9 kg), but confirm your monitor falls within the arm’s rated range.

    Can I use a monitor arm with a standing desk?

    Yes, but you need to account for the arm’s vertical range. When your desk rises, the monitor rises with it, so a short-travel arm may leave your screen too high when standing. Look for arms with at least 13–15 inches of vertical adjustment to accommodate sit-stand transitions without needing to reposition the arm itself.

    Electric standing desks with cable-management trays can also interfere with arm clamps. Make sure there’s a clear, flat section of desk edge where the clamp can grip securely. If you’re planning a full cord-free desk setup, mounting a monitor arm early helps you route cables cleanly before adding other accessories.

    What if my desk is against a wall or has limited depth?

    Standard monitor arms extend 15–20 inches from the clamp point. If your desk is shallow or pushed against a wall, the arm may not have enough room to swing back, leaving your monitor too far forward. Measure from the rear edge of your desk to where you want the monitor positioned—this is your usable depth.

    Low-profile or wall-mounted arms work better in tight spaces, but they sacrifice flexibility. If you’re working with a compact setup, consider how the arm’s footprint interacts with other desk elements. Pairing a properly sized monitor arm with smart cable management keeps everything functional without crowding your workspace.

    Do I need a single or dual monitor arm for my setup?

    If you’re running two monitors, a dual monitor arm (affiliate link) saves desk space and keeps both screens aligned at the same height. Make sure the combined weight of both monitors doesn’t exceed the arm’s capacity, and verify that both use the same VESA pattern for easier installation.

    Single arms offer more independent positioning but take up two clamp spots, which can be a problem on narrower desks. For side-by-side monitors of different sizes or brands, two single arms often provide better ergonomic control than a fixed dual-arm configuration.

  • Drawer Organizer Checklist: What to Store Where for a Clean Desk

    Drawer Organizer Checklist: What to Store Where for a Clean Desk

    This article includes affiliate links. We may earn a commission on qualifying purchases, at no additional cost to you.

    A desk drawer can either be a strategic storage system or a chaotic junk pile. The difference comes down to intentional placement—knowing what belongs in which drawer and how to keep categories separate. This checklist walks through how to organize your desk drawers by function, so you can find what you need without digging.

    Most desks come with two to four drawers of varying depths. The goal is to match item type, frequency of use, and drawer size so everything has a dedicated spot. Based on published ergonomic guidelines and common home-office workflow patterns, here’s how to organize each drawer.

    Top Drawer: High-Frequency Essentials

    Your top drawer should hold items you reach for multiple times per day. This is prime real estate—shallow, close to your hands, and easiest to access without leaning or standing.

    • Writing tools: Keep three to five pens/pencils you actually use, not the dozen freebies from conferences.
    • Sticky notes and small notepads: Place near the front edge for quick grabs during calls.
    • Paper clips and binder clips: Use a small container or tray compartment to prevent scatter.
    • USB drives and SD cards: Store in a dedicated section; these are easy to lose in clutter.
    • Headphones or earbuds: If you use them daily, keep them in the top drawer rather than tangled on your desk.

    A 7-piece drawer organizer set (affiliate link) can divide this drawer into fixed zones, preventing the slow creep of miscellaneous items.

    Middle Drawer: Stationery and Supplies

    The middle drawer typically has more depth and should house less-frequent supplies that still support your daily work.

    • Extra notebooks and legal pads: Stack vertically if the drawer is deep enough.
    • Tape, stapler, and scissors: Keep these together in one section; they’re used occasionally but need to be findable fast.
    • Charging cables you swap regularly: Lightning, USB-C, or micro-USB cables you cycle through devices.
    • Stamps, envelopes, and return labels: Useful for home-office invoicing or returns.
    • Business cards: Store in a small box or cardholder to avoid bending.

    If you’re working with limited drawer space, check out minimalist desk setup ideas for tips on reducing what you keep on hand.

    Bottom Drawer: Archival and Overflow

    The deepest drawer is best for items you need monthly or less, plus bulkier supplies.

    • Manuals and warranties: Keep product documentation for your desk gear in a labeled folder.
    • Old notebooks or project files: Archive completed work you might reference later.
    • Extra power adapters and backup cables: Store coiled with velcro ties to prevent tangles.
    • Seasonal items: Desk fan in winter, portable heater manual in summer.
    • Office supplies in bulk: Extra pens, notepads, or sticky note packs you haven’t opened yet.

    File Drawer (If Available): Documents Only

    If your desk includes a file drawer with hanging rails, reserve it exclusively for paper files.

    • Active project folders: Keep current client work, contracts, or reference sheets within reach.
    • Tax documents and receipts: Use labeled folders by year or category.
    • Instruction sheets: Printouts for software workflows or device setup steps.
    • Printed invoices or statements: Anything you need in hard copy for record-keeping.

    For tips on clearing visible clutter before organizing drawers, see our guide on common cable management mistakes.

    What Doesn’t Belong in Desk Drawers

    Some items create mess or waste prime drawer space:

    • Food wrappers or snacks: These attract pests and create odors.
    • Dead batteries or broken electronics: Recycle or dispose of these properly.
    • Duplicate tools: You don’t need four staplers or ten highlighters.
    • Unread mail or random receipts: Process or file these, don’t just stash them.

    Organizing by drawer function keeps your workspace efficient and reduces the time spent hunting for basics. Define zones, stick to categories, and revisit the system every few months to prevent drift.

  • Cable Clips vs Cable Raceways: Which Is Right for Your Desk?

    Cable Clips vs Cable Raceways: Which Is Right for Your Desk?

    Heads up: some links in this post are affiliate links, which means we may earn a small commission if you make a purchase — at no extra cost to you.

    When you’re organizing cables on or around your desk, two of the most popular solutions are adhesive cable clips and cable raceways. Both hide or control wires, but they work in fundamentally different ways. Choosing the wrong one can leave you with a half-finished setup or adhesive residue you didn’t bargain for.

    This comparison breaks down the key differences so you can pick the solution that fits your cable count, desk surface, and how permanent you want the installation to be.

    Quick Comparison: Cable Clips vs Cable Raceways

    Feature Cable Clips Cable Raceways
    Best for Low cable counts (1–3 cables), routing along edges or vertical surfaces High cable counts (4+ cables), wall-mounted runs, permanent installations
    Installation Adhesive backing or screw mount; quick and repositionable Adhesive or screw mount; requires measuring and cutting to length
    Appearance Minimal footprint; individual clips visible but discrete Enclosed channel hides cables completely; cleaner look for bundled wires
    Flexibility Easy to add or remove cables; no disassembly needed Requires opening channel cover to add/remove cables
    Common use cases Desk edges, monitor stands, keyboard cables, charging cables Baseboards, walls behind desks, TV cable runs, permanent office setups
    Typical price $6–12 for a pack of 50–100 clips $12–20 for a 6-foot raceway kit with connectors

    What the Table Tells You

    Cable clips are the go-to for light-duty organization. If you have a couple of USB cables, a monitor cable, or a desk lamp cord to wrangle, clips let you route them along the edge of your desk or down a monitor arm without committing to a bulky solution. They’re also easy to reposition if you make common desk setup mistakes the first time around.

    Cable raceways, on the other hand, excel when you need to bundle multiple cables together and keep them completely out of sight. If you’re running power strips, ethernet, HDMI, and USB cables along a wall or baseboard, a raceway provides a clean, finished look. A PVC cable raceway duct (affiliate link) is particularly useful for permanent home office setups where aesthetics matter and cable counts are high.

    The trade-off is flexibility. Adding a new cable to a raceway means popping off the cover, threading the wire through, and snapping it back on. With clips, you just stick a new one wherever you need it. If you swap devices frequently or you’re still experimenting with your layout, clips are more forgiving.

    For renters or anyone who might relocate, clips are easier to remove without damaging paint or leaving visible holes. Raceways, especially screw-mounted versions, are harder to reverse and better suited for long-term installations.

    If you’re aiming for a completely wireless aesthetic, you might find that a combination of both works best—clips for the few remaining cables and a raceway to hide power runs along the wall. You can see more about reducing visible cords in our guide on how to build a cord-free desk setup.

    Bottom line: use cable clips when you have just a few cables and need quick, reversible control. Choose a raceway when you’re bundling multiple cables permanently along a wall or baseboard and want a fully enclosed, polished finish.

  • Clip-On vs Freestanding Desk Lamps: Which Style Works for Your Setup

    Clip-On vs Freestanding Desk Lamps: Which Style Works for Your Setup

    This article includes affiliate links. We may earn a commission on qualifying purchases, at no additional cost to you.

    When you’re adding task lighting to your desk, one of the first decisions you’ll face is whether to go with a clip-on lamp or a traditional freestanding model. Both solve the same basic problem—getting focused light where you need it—but they differ significantly in footprint, flexibility, and ideal use cases. Here’s how to decide which style fits your workspace.

    Space Requirements and Desk Real Estate

    Freestanding lamps need a dedicated spot on your desk surface. Most models occupy a circular or rectangular footprint ranging from 6 to 10 inches, which can be a dealbreaker if you’re working with limited space. If you’ve already filled your desk with monitors, notebooks, and other essentials, that base takes up room you might not have.

    Clip-on lamps eliminate the base entirely. They attach directly to your desk edge, shelf, or monitor arm, keeping your work surface clear. This makes them especially useful in compact setups where every square inch counts. The tradeoff: you need a clippable edge. Desks with thick lips, rounded edges, or wall-mounted shelves may not accommodate standard clips.

    Adjustability and Light Positioning

    Most freestanding desk lamps offer adjustable arms or necks, letting you tilt and angle the light head. Higher-end models feature multi-joint arms with broad range of motion, while budget options may only tilt at one or two points. Because the base is stationary, your light source can only reach as far as the arm extends—usually within a radius of 12 to 18 inches from the base.

    Clip-on lamps typically use flexible gooseneck designs or articulating arms. Since the clamp itself can be repositioned along your desk edge, you gain an extra dimension of placement flexibility. You can clip it behind your monitor for backlighting, on the side for task lighting, or even attach it to a bookshelf for overhead illumination. This adaptability is valuable if you rearrange your workspace frequently or need to light different zones at different times.

    Stability and Weight Considerations

    A well-designed freestanding lamp with a heavy base stays put. You won’t accidentally knock it over when reaching for your coffee, and it won’t shift when you adjust the angle. Lighter models can tip if you extend the arm too far, but weighted bases generally prevent this.

    Clip-on lamps depend entirely on clamp strength and desk thickness. A weak clamp or thin desk edge can cause the lamp to sag, slide, or topple under the weight of the light head—especially if you’re adjusting it frequently. Based on customer feedback, lamps with padded metal clamps and adjustable tension screws perform best. Avoid plastic clips for anything heavier than a small LED head.

    Power and Features

    Both styles are available with similar feature sets: adjustable brightness, color temperature controls, USB charging ports, and timers. Freestanding models more commonly include warm and cool lighting modes built into higher-end designs, along with touch controls and memory settings.

    Clip-on lamps tend to skew simpler and more budget-friendly, though rechargeable LED options are increasingly common. If you want a lamp that doubles as a device charger or integrates with smart home systems, freestanding models offer more variety. For straightforward task lighting without the extras, either style works fine.

    Which One Should You Choose?

    Go with a clip-on lamp if you’re tight on desk space, need to reposition your light source regularly, or want to keep your work surface completely clear. They’re ideal for small desks, monitor-mounted setups, and renters who rearrange frequently.

    Choose a freestanding lamp if you have room for a stable base, prefer a more permanent lighting solution, or want access to advanced features like wireless charging or app control. A quality option like a rechargeable LED desk lamp (affiliate link) gives you flexibility to move it around without hunting for an outlet, while still offering the stability of a freestanding design.

    Neither style is objectively better—it’s about matching the form factor to your desk layout, workflow, and how often you change things up.

  • Desk Ergonomics FAQ: Chair, Monitor Height, and Wrist Support Explained

    Desk Ergonomics FAQ: Chair, Monitor Height, and Wrist Support Explained

    This article includes affiliate links. We may earn a commission on qualifying purchases, at no additional cost to you.

    Desk ergonomics questions tend to repeat: how high the monitor should sit, whether a wrist rest actually helps, and whether a standing desk converter is worth the money. Here are direct answers to the ones we hear most often, without suggesting you need to replace your entire setup to fix them.

    Bright home office with ergonomic chair and monitor on an arm

    How high should my monitor actually be?

    As a starting point, the top of your screen should sit at or just below eye level, with the whole display about an arm’s length away. If you’re constantly tilting your neck down to read text, the monitor is too low; if you’re tipping your head back, it’s too high. A fixed stand often can’t hit the right height for every chair or desk combination, which is why an adjustable arm tends to solve this faster than stacking books under a monitor. We cover what to look for in our monitor arm buying guide. This single monitor arm (affiliate link) gives you enough height and tilt range to fix this without much setup time.

    Does a wrist rest actually help, or does it just move the problem?

    Used correctly, a wrist rest supports your wrists between keystrokes, not while you’re actively typing — resting your wrists on anything while typing tends to bend them upward, which is the opposite of what you want. The bigger fix is usually keyboard and desk height working together so your forearms stay roughly level. If wrist or hand discomfort is a recurring issue rather than an occasional one, it’s worth reading more in our guide to wrist pain at your desk.

    Is a standing desk converter worth it if I already have a regular desk?

    It depends on what you’re solving for. A converter won’t fix poor monitor height or a bad chair on its own, but it does let you break up long sitting stretches without buying a new desk. It’s a reasonable middle step if you want to try standing part of the day before committing to a full sit-stand desk. We walked through setup and budget options in how to set up a standing desk converter.

    Ergonomic office chair beside a desk with an adjustable monitor arm

    Does the desk surface itself make a difference?

    It can, mostly around wrist comfort and how much your mouse or keyboard shifts during the day. A mat with some cushioning and a non-slip base keeps your hands in a more consistent position than typing directly on a hard or slippery desktop. We compared surface options in how to pick a desk mat that doesn’t slide around. A large felt desk mat (affiliate link) is a low-cost way to test whether this actually helps before spending more.

    Do I need to fix everything at once?

    No — start with whatever’s causing actual discomfort right now, whether that’s your neck, wrists, or lower back, and address that one thing first. Most of these fixes are inexpensive and reversible, so there’s no need to overhaul the whole desk in one weekend.

  • Smart Desk Gadgets Checklist: What’s Actually Worth Adding to Your Setup

    Smart Desk Gadgets Checklist: What’s Actually Worth Adding to Your Setup

    This post contains affiliate links. If you buy through these links, we may earn a commission at no extra cost to you.

    “Smart desk gadgets” covers a lot of ground, from genuinely useful hubs to things that look nice in a flat-lay photo and then sit unused by week two. Before adding anything new to your setup, it helps to sort gadgets into three buckets: things you’ll reach for daily, things that solve a specific seasonal problem, and things you can safely skip. This checklist walks through what’s actually worth checking off first.

    Overhead view of a desk with smart gadgets including wireless earbuds and phone

    Start With What You Actually Plug In Every Day

    Before buying anything new, count how many devices compete for the same two or three ports on your laptop. If you’re constantly unplugging a mouse dongle to plug in a monitor cable, then swapping that for a phone charger, that’s the real problem — not a lack of gadgets, just too many trade-offs at one connection point. Once you know exactly what needs to stay connected at the same time, the rest of this list gets a lot easier to shop for.

    Checklist Item 1: A Hub That Matches Your Actual Ports

    A USB hub or docking station only helps if it covers the ports you use, not the ports a spec sheet lists. If you regularly connect an external monitor, a wired keyboard, and a phone at the same time, a single small dongle usually isn’t enough — you’ll want something with dedicated HDMI, multiple USB-A, and pass-through charging. We compared the two main options in more detail in our USB hub vs. docking station guide, including when the cheaper hub is genuinely enough. This 8-in-1 USB-C hub (affiliate link) is a reasonable starting point if you need HDMI output plus a few extra ports without committing to a full docking station.

    Checklist Item 2: Wireless Charging, With One Condition

    A wireless charging pad only earns its spot on the desk if your phone actually supports Qi charging without a case swap — otherwise it becomes a pad you keep meaning to use and don’t. If that condition is met, it’s a genuinely convenient upgrade: drop your phone down between calls instead of hunting for a cable. We go through the trade-offs, including charging speed and case compatibility, in our wireless charging pad breakdown. A basic foldable wireless charging stand (affiliate link) covers most desks without taking up much space.

    Checklist Item 3: Airflow for Warmer Months

    This one is seasonal rather than essential, but if your desk sits away from a window or air vent, a small USB-powered fan solves a real problem cheaply. It won’t replace air conditioning, but it makes a noticeable difference during a long afternoon of video calls. We covered a few low-cost airflow options, fans included, in how to keep your desk cool in summer.

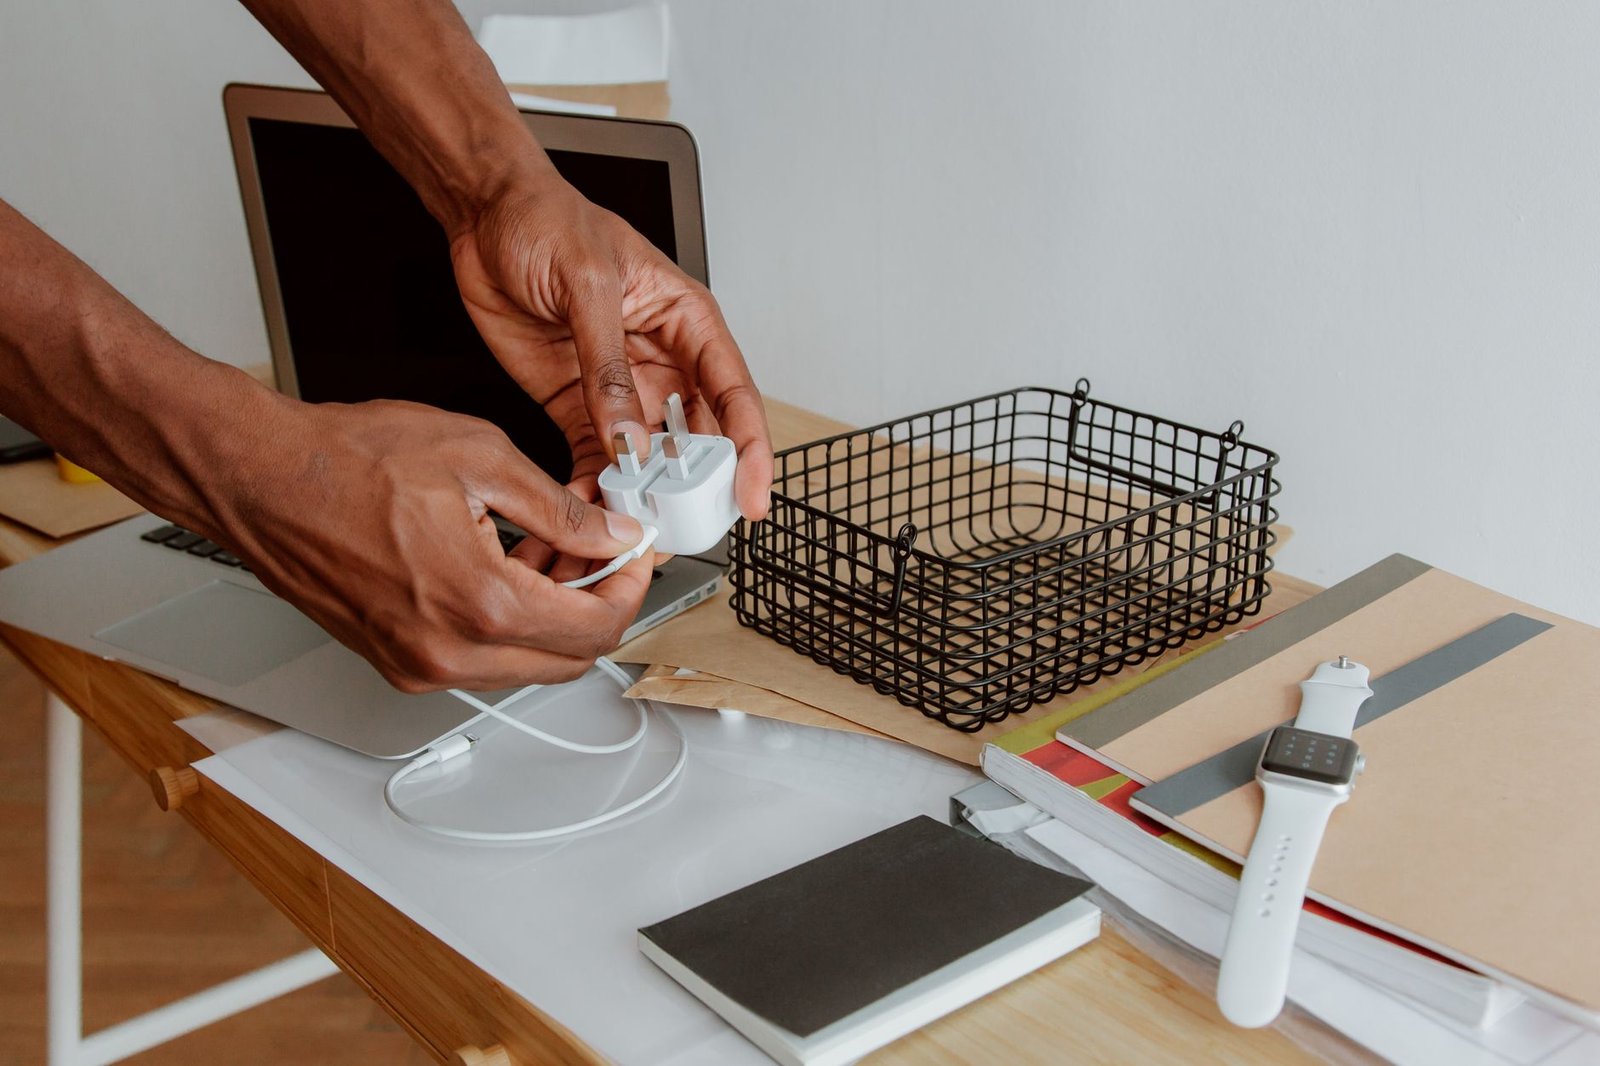
    Smartwatch next to a laptop on a desk

    What Can Wait

    Not everything marketed as a “smart desk gadget” needs a spot on your setup right away. Decorative LED strips, novelty desk toys, and gadgets that duplicate something your phone already does well are easy to skip until the essentials above are actually in place. Start with the connection problem, then the seasonal one, and only add extras once you’ve used the setup long enough to know what’s actually missing.